Connecting Ascora to your preferred accounting software—such as Xero, MYOB, or another platform—streamlines your workflow by keeping financial and customer data synced in real time. Instead of manually transferring information between systems, you can import customer records directly from your accounting package into Ascora. This guide walks you through the step-by-step process of establishing the integration, logging in to your accounting account, selecting your account codes, and importing your customer data. Once set up, you’ll have a unified, accurate view of customer details across both Ascora and your accounting platform, helping you save time and reduce errors.
Access the Integration Settings
Authorize Ascora in Your Accounting Software
Initial Customer Import Importing Customer Data Manually Final Checks and Next Steps
Access the Integration Settings
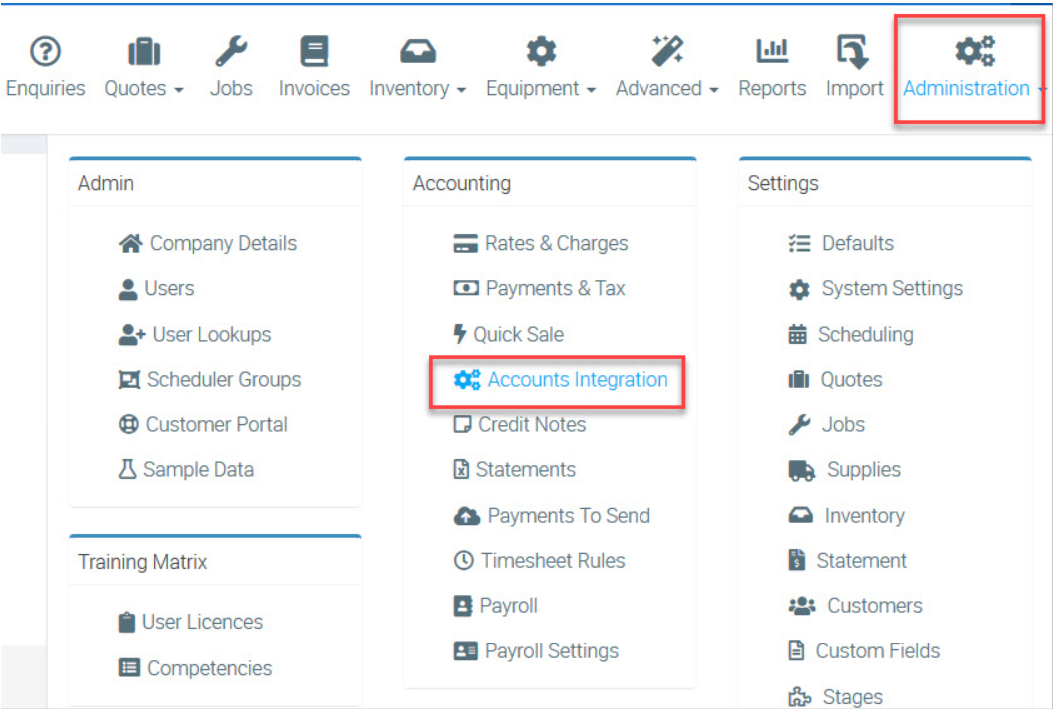
- Navigate to Administration → Accounts Integration in Ascora.
- In the Accounting Package dropdown, select your platform (e.g., Xero, MYOB, etc.).
- Click Connect to Accounting Package.
Tip: Ensure you have the appropriate login credentials and the necessary permissions in your accounting software before proceeding.
In this example, we are connecting Xero.

Authorize Ascora in Your Accounting Software
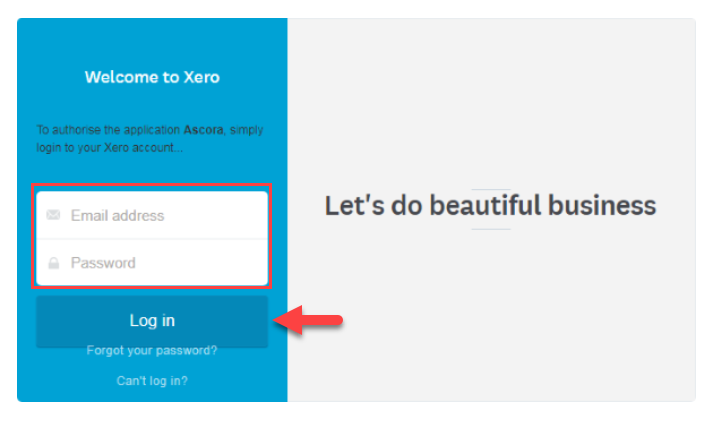
- Enter your login details when prompted by your accounting package.
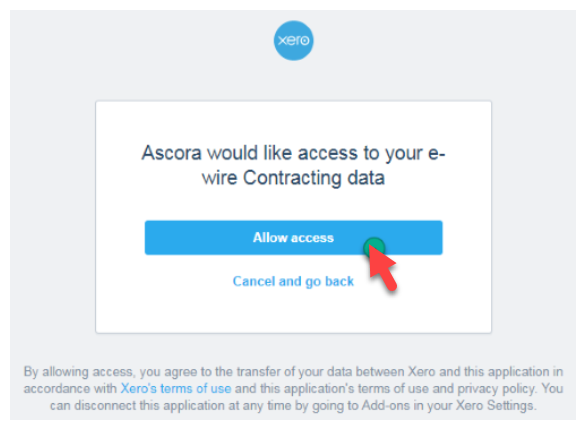
- If using Xero, for example, you’ll see a screen asking you to Allow access to your account.
- Once authorized, you’ll be redirected back to Ascora to finalize the integration.
3. Enter your Accounting Package log-in details and click the Log in button. Xero will ask you to allow Ascora access to your Xero Account.
4. Click the Allow access button to allow Ascora to integrate with Xero. You will be redirected back to Ascora to finish the integration.
Map Your Account Codes
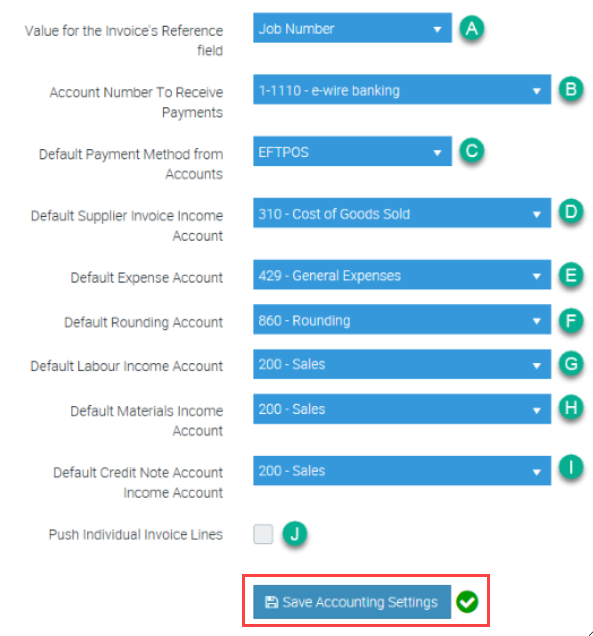
After a successful connection, Ascora will display a list of Account Code options. This step tells Ascora how to categorize income, expenses, and other financial transactions when syncing data with your accounting software.
- Review each entry in the list (e.g., Sales, Materials, Services).
- Select the corresponding account codes from your accounting package’s chart of accounts.
- Click Save Accounting Settings to confirm.
Initial Customer Import
When the setup is complete, Ascora will prompt you to import your existing customers from the accounting package.
- Click Yes, import all my customers to begin immediately.
- Ascora will pull in customer data—such as names, contact info, and addresses—directly from your accounting software.
Importing Customer Data Manually
If you opted out of the initial import or need to re-import data:
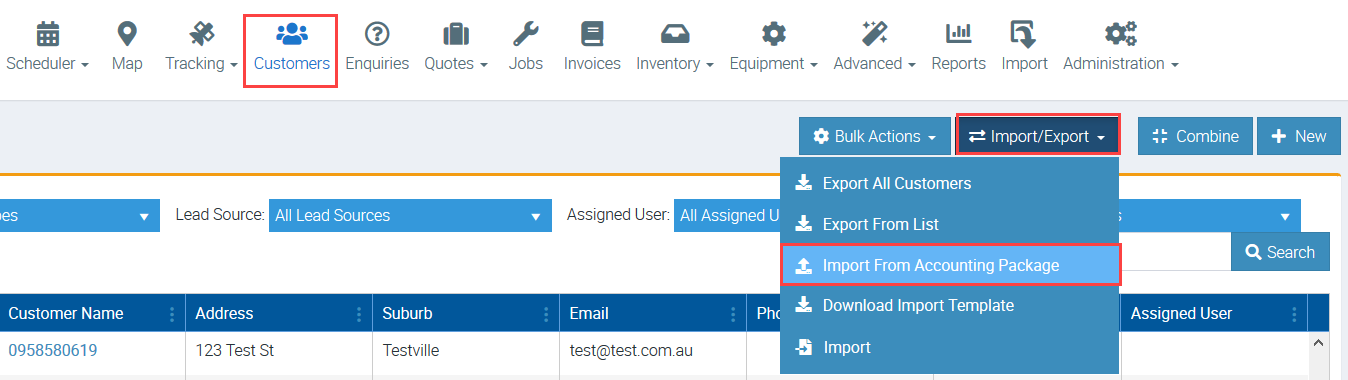
- Go to the Customers menu in Ascora.
- Click Import/Export and select Import From Accounting Package.
- Ascora will fetch and synchronize contacts from your accounting software.
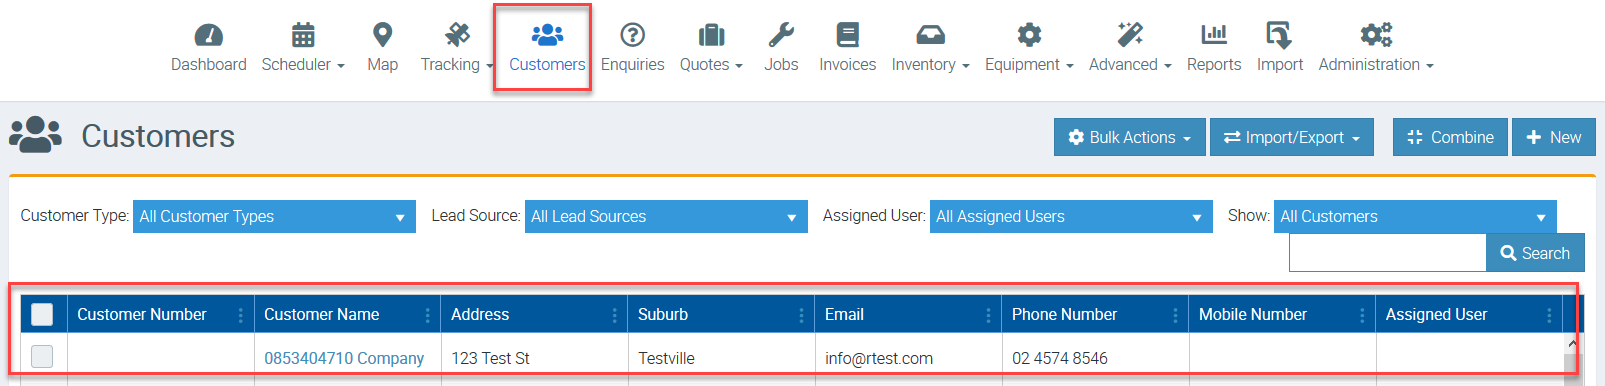
Ascora will now read your contacts in Xero and please wait for the importer to complete the process.

Once the importer finishes, your newly added customers will appear in the Customers list.
Final Checks and Next Steps
- Verify Customer Records: Confirm that essential data (names, contact details) is accurate and complete.
- Set Up Integrations: If needed, further customize your accounting link by exploring advanced features like invoice syncing and payment tracking.
- Maintain Ongoing Sync: Continue to add or update customers in either system, and let Ascora handle the automatic synchronization to keep both databases current.
By completing these steps, you’ll have a streamlined process that keeps customer information consistent between Ascora and your accounting package—helping you save time, reduce errors, and maintain a clear financial overview.
Got a question?
Submit an Idea 💡 Go to Ideas Portal