The Custom Fields feature in Ascora allows you to extend the information you store across key areas of the system. By creating custom fields, businesses can tailor data entry to their specific needs, ensuring all necessary details are captured efficiently. These fields can be used across both the Ascora Web Portal and Mobile Apps, providing flexibility and consistency in data management.
With custom fields, you can:
✔️ Capture additional details for customers, jobs, quotes, equipment, and more.
✔️ Organize and display job-specific information based on Job Types.
✔️ Integrate custom fields into document templates, ensuring critical data appears in job cards, quotes, invoices, and purchase orders.
Whether you need simple checkboxes, dropdown lists, or text fields, Ascora's Custom Fields feature provides a structured way to store and retrieve essential business data.
The guide below will walk you through creating, managing, and using Custom Fields effectively within Ascora.
📽 Watch the video guide ⤵
You can extend the information you can store on many of the key screens in Ascora by adding Custom Fields. Custom Fields are displayed and can be edited on both the Ascora Web Portal and Mobile Apps.
Custom Fields can be added to the following entities:
- Enquiries
- Customers
- Tasks
- Equipment
- Quote/Job Equipment
- Quotes
- Jobs
- Purchase Orders
- Invoices
Custom Fields By Job Type
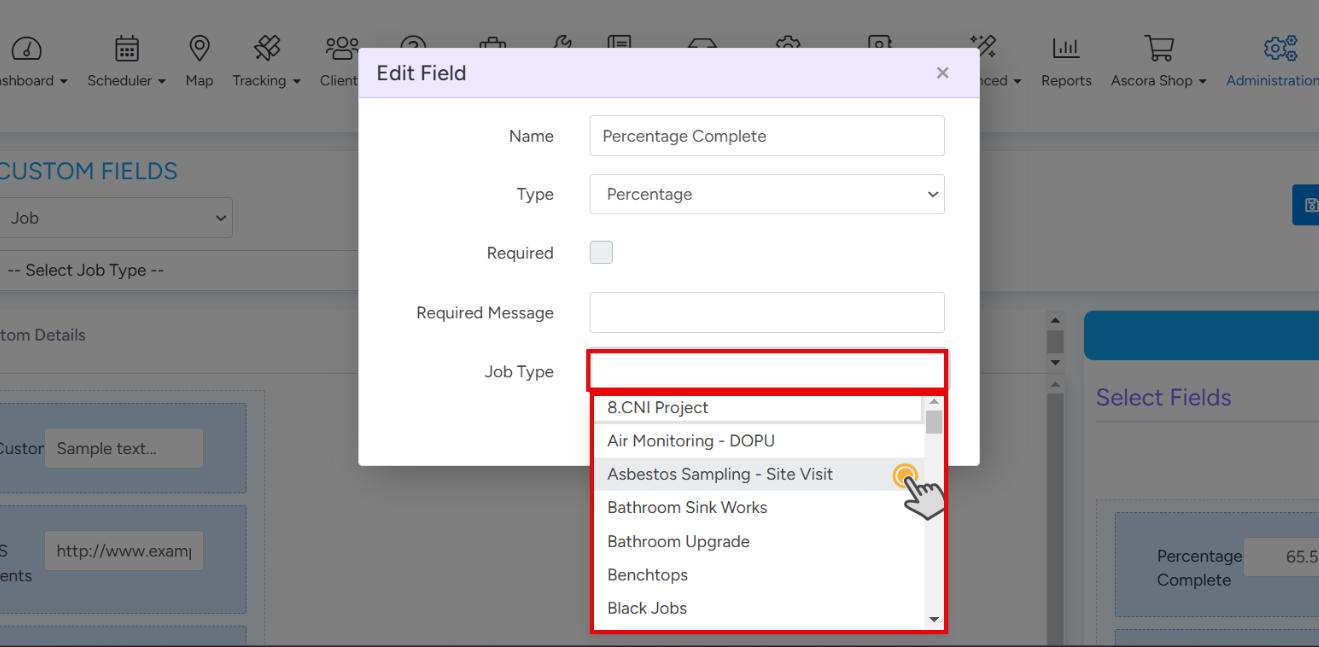
When creating a custom field, you can now assign it to a specific job type. This will ensure that the correct fields become available depending on the job type itself.
Custom Fields can also be displayed in the related Document Templates for:
- Quotes
- Jobs
- Invoices
- Purchase Orders
Custom Field Types
| Field Type | Description |
|---|---|
| Heading | Large Text Heading useful for separating data inputs |
| Text Box | A single line for free-entry |
| Text Area | A larger multi-line text entry |
| Checkbox | Single Yes/No field |
| Radio Button List | Displays a list of options of which one can be selected |
| Date | Date only field |
| Date Time | Date and Time field |
| Time | Time only field |
| Money | Currency formatted field |
| Percentage | Percentage field |
| Number | Decimal entry |
| Whole Number | Whole Number only |
| Dropdown List | Displays a list of options of which one can be selected |
Creating a new Custom Field
- Go to Administration → Custom Fields
- Select the screen to which you want to add the field
- Select either the Details or Custom Details tab
- Click Add Field.
- Fill out the field name and select the Type. If using a Dropdown List or Radio Button List enter the possible options in the Options
- Select the Job Type and assign this field to a specific job type or types.
Click Save.
The newly created field will in the list on the Right under Select Fields.
Drag the field into the desired position on the screen.
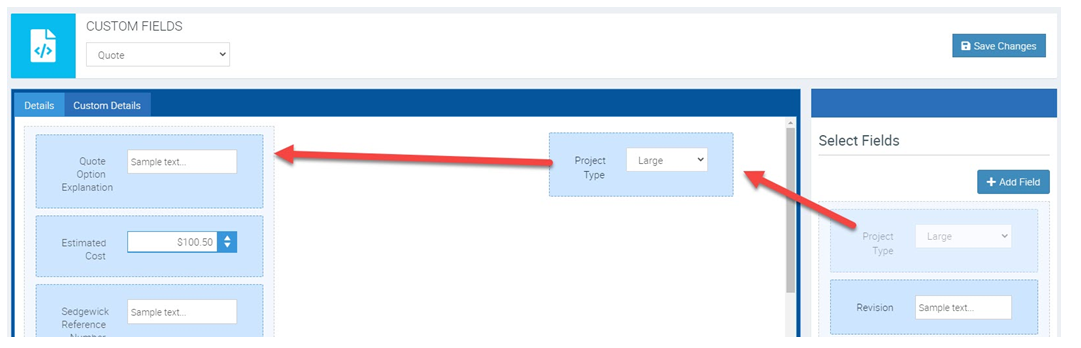
Click Save Changes.
Using Custom Fields In Templates
Custom Fields can be displayed in the related Document Templates for:
- Quotes
- Jobs
- Invoices
- Purchase Orders
This allows you to pull information from a Customer through into a related Quotation Template or Job Card for example. You can also pull through Quote details into various places in a Quotation document.
Other uses include displaying Equipment service history as part of a Job Card document.
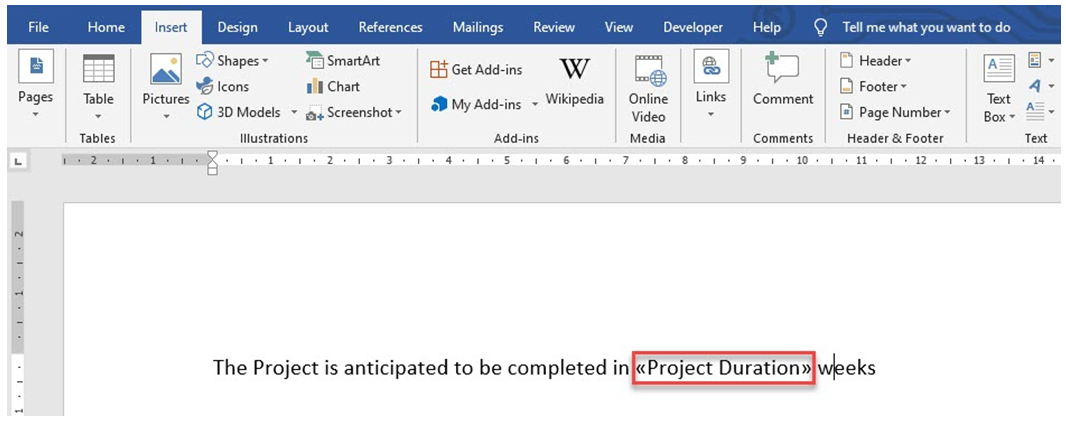
To add a Custom Field to a Template:
Under Administration → Document Templates select the Template you wish to modify.
Download and open the related Word template.
Insert a Merge Field – from the Insert Menu click Quick Parts → Field

Select Merge Field in the options on the left (or type in quickly me to select Merge Field)
Enter (or copy and paste) in the field name.
Click Ok and the merge field will be added to the document.
Save and upload your updated document Template.
Sub Pages