In Ascora, you can streamline your quoting process by defining common inclusions (items or services typically covered) and exclusions (items or services not included).
Once set up, these lists can be quickly added to any quote and displayed in your final quote document. By configuring your Quote Template to reference these lists, you’ll save time on repetitive data entry, maintain consistency in what you promise customers, and enhance clarity around the scope of work.
Follow the steps below to create and manage inclusions/exclusions, customize your quote templates, and then test the final quote document to ensure it accurately reflects the details you want to share with your clients.
📽 Watch the video guide ⤵
There are two steps to complete in order to add Inclusion and Exclusion to Quotes. First is to configure your list of inclusions and exclusions in Administration → Quotes and once done, configure your Quote Template in order to pick up inclusion and exclusion details automatically.
Setting up Inclusions/Exclusions
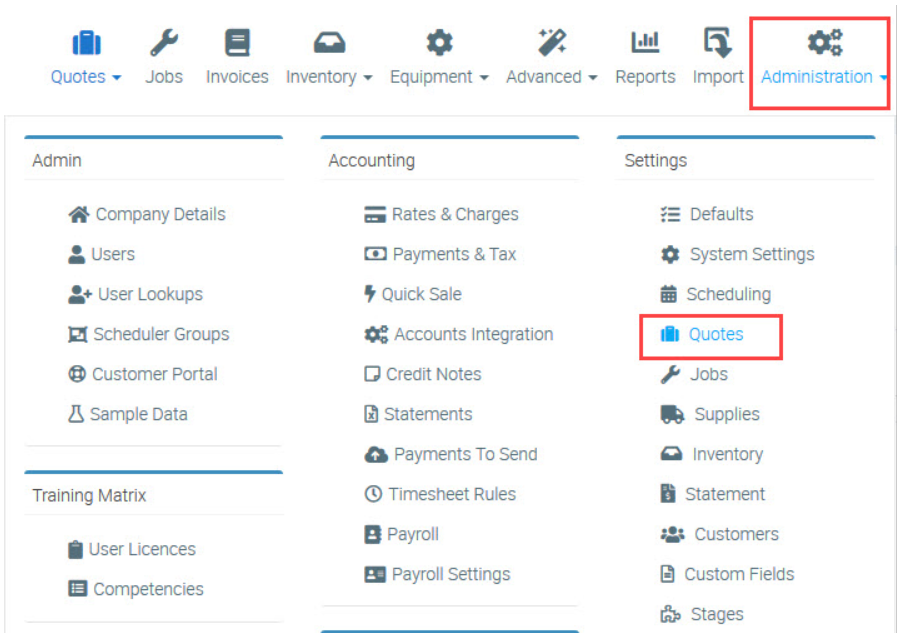
1. Go to Administration → Quotes.
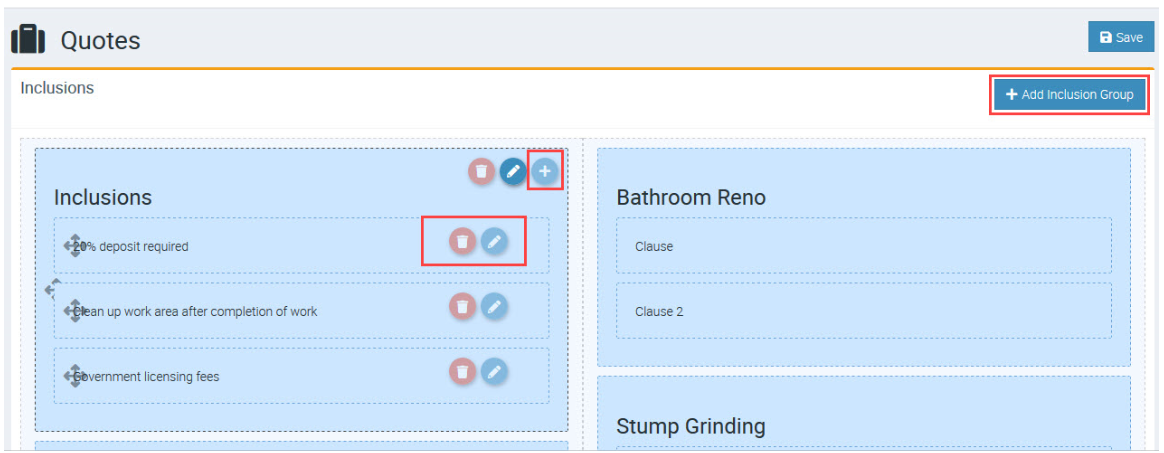
2. Click Add Inclusions Group and enter "Inclusions" as name.
Click the + icon to add individual inclusion lines and once done, click Save. You can also click the Pen icon to edit or Trash icon to delete.
Configuring your Quote template
1. Go to Administration → Document Templates and edit your Quote template following the steps below.

Step 3 Reference
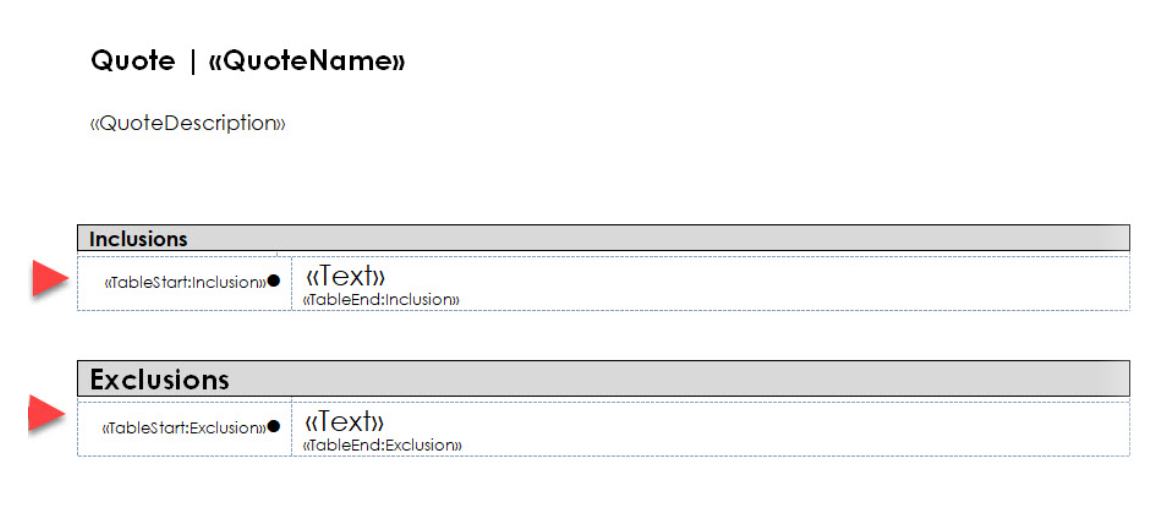
When editing your Quote template, please ensure to add the corresponding tables and merge fields for inclusions and exclusions as indicated in the image below.
Congratulations, you've now successfully set up your Inclusions and Exclusions for Quotes.
Testing your Quote Template with Inclusions and Exclusions
1. Go to Quotes tab and access the quote that you need to test. From the Details tab, scroll down and look for Inclusions and Exclusions area.
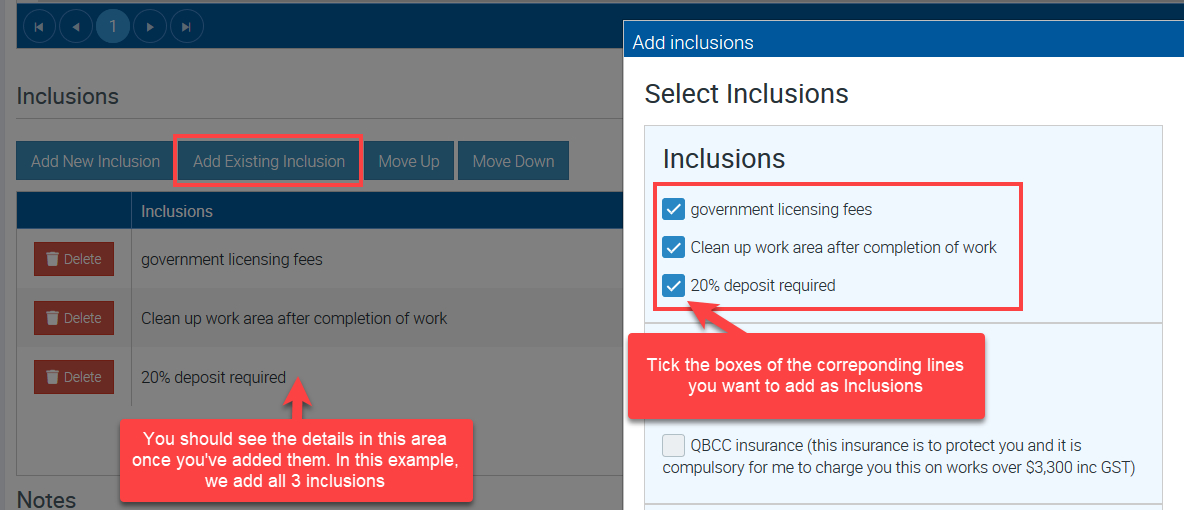
Click Add Existing Inclusion and select from your existing list. You can follow the same steps to add exclusions in Exclusions area.
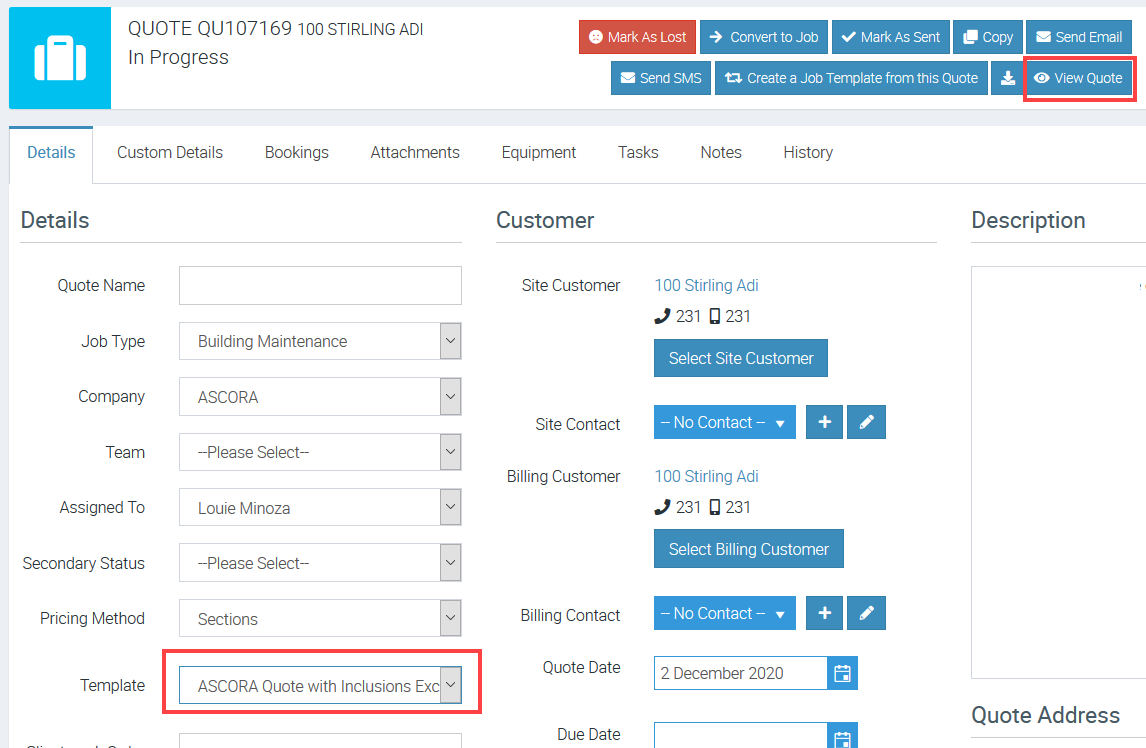
2. After adding inclusions and exclusions, go back to the main Quote screen and select the quote template configured to pick up inclusions/exclusions and click View Quote.
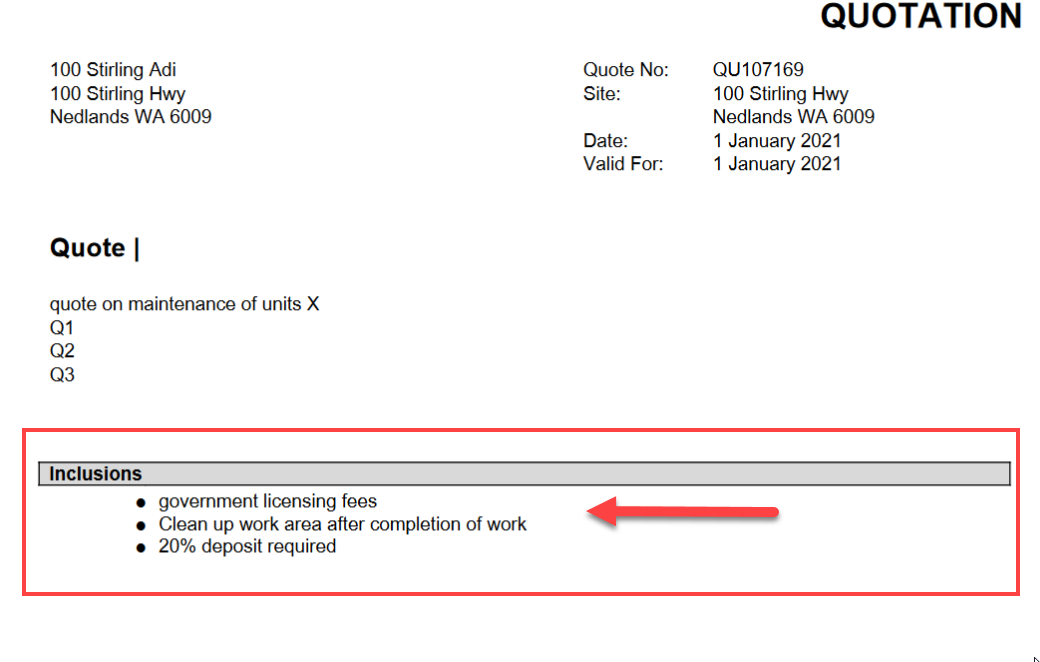
3. You should now see inclusions in your quote document.
In this example, we added 3 inclusions which are shown once quote document is generated.
Got a question?
Submit an Idea 💡 Go to Ideas Portal