The Job Email Importer in Ascora streamlines job management by allowing customers to email job details directly to a designated mailbox, where Ascora automatically reads the information and creates a new job or quote. This feature reduces manual data entry, minimizes errors, and ensures job requests are captured efficiently.
With proper setup, you can:
This guide will walk you through configuring the importer, setting up email formats, and mapping job fields, ensuring that your workflow remains seamless and organized.
▶ Job Email Import Configuration
Job Email Import Configuration
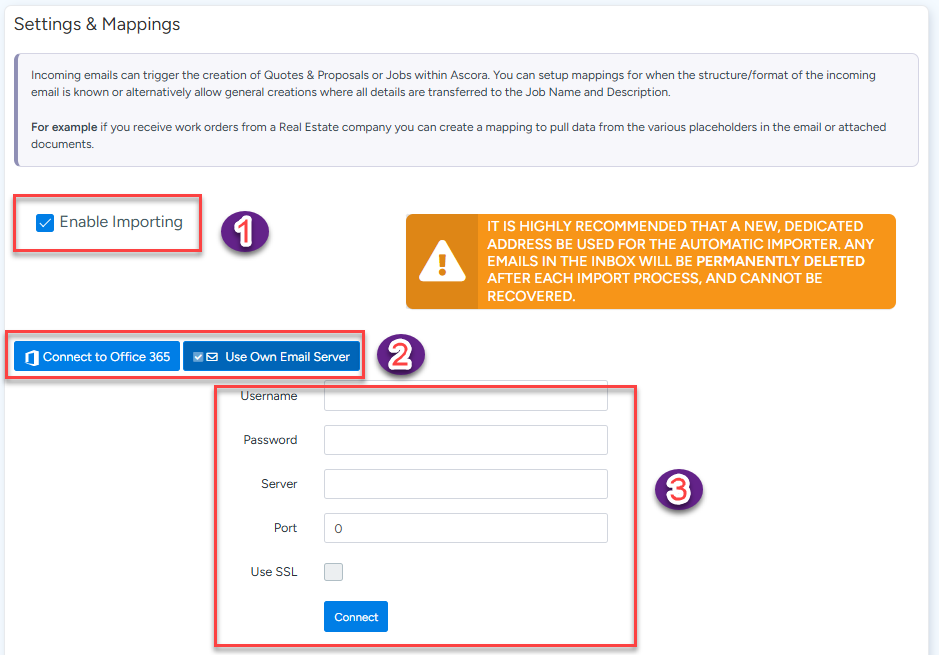
Configuration for the Job Email Importer can be found in Administration → Job Import From Email

- Enable Importing
- Choose if you want to connect to Office 365 or use your own email server
- Enter in details
- Click connect
Creating a Job Email Format
To create a new format, simply click the Create button.

Refer to the image below to complete steps A, B, C, and D.
In this example we are are setting up an automatic job import for the emails coming from jmcptyltd@gmail.com and once imported, jobs will be added to customer JMC PTY Ltd.
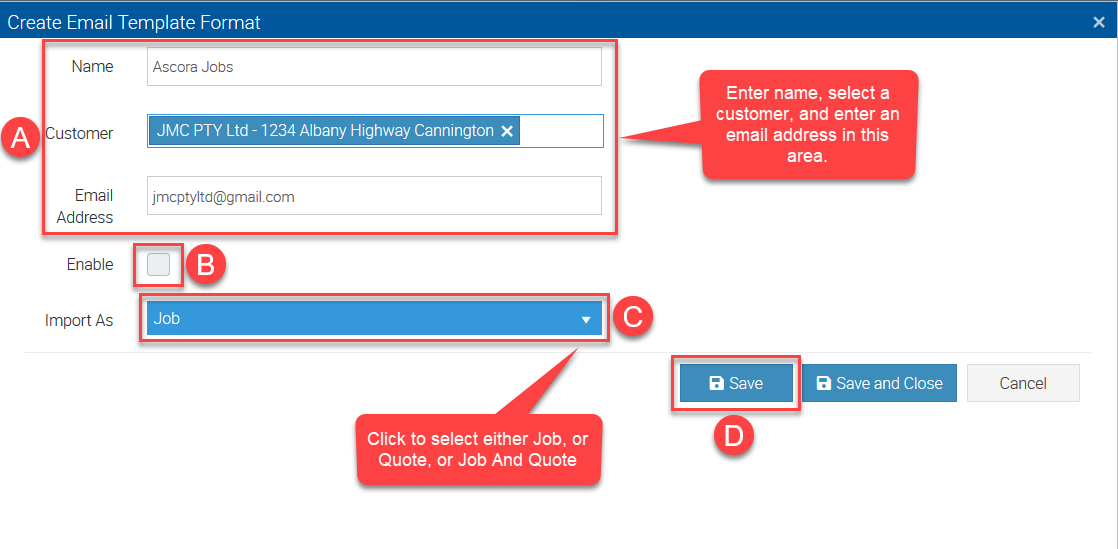
Refer to the image below to complete steps A, B, C, and D when you choose to import the emails as Job And Quote.
In this example, we selected the option to import the email as Job And Quote and configured it to identify the key word "job" from the subject line and import as job. If the importer cannot find the key word "job" then the email will be imported as quote.

Creating Fields for Mapping
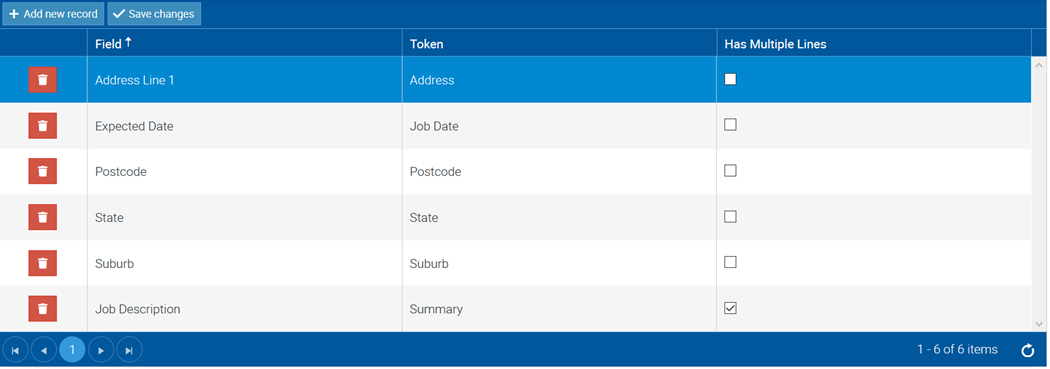
Once the format has been created, mappings for the Jobs fields can be created.
To add a new mapping, simply click Add New Record button to add a new row to the table below.
The table contains the following columns:

An example below.
Got a question?
Submit an Idea 💡 Go to Ideas Portal