Progress Claims in Ascora provide a structured and flexible approach to invoicing for jobs that require staged payments. Whether you're billing based on work completed, specific project milestones, or job supplies, Ascora’s Progress Claims feature allows you to generate claims at any stage, ensuring a smooth payment process for both you and your clients.
What You’ll Learn in This Guide:
- Setting Up Progress Claim Sections – Choose between a full job value claim or claims based on individual job supplies.
- Generating a Claim against the Progress Claim – Learn how to apply claims as a percentage or fixed amount of the total job value.
- Managing Payments – Record and track payments received against a claim, ensuring accurate financial reporting.
- Downloading & Sending Claims – Generate professional progress claim documents and send them via email directly from Ascora.
- Editing & Deleting Claims – Understand how to adjust claims or delete them when necessary.
By using Ascora’s Progress Claims, you can streamline your invoicing workflow, improve cash flow management, and maintain clear financial records for ongoing jobs.
📽 Watch the video guide ⤵
Setting Up Progress Claims Sections
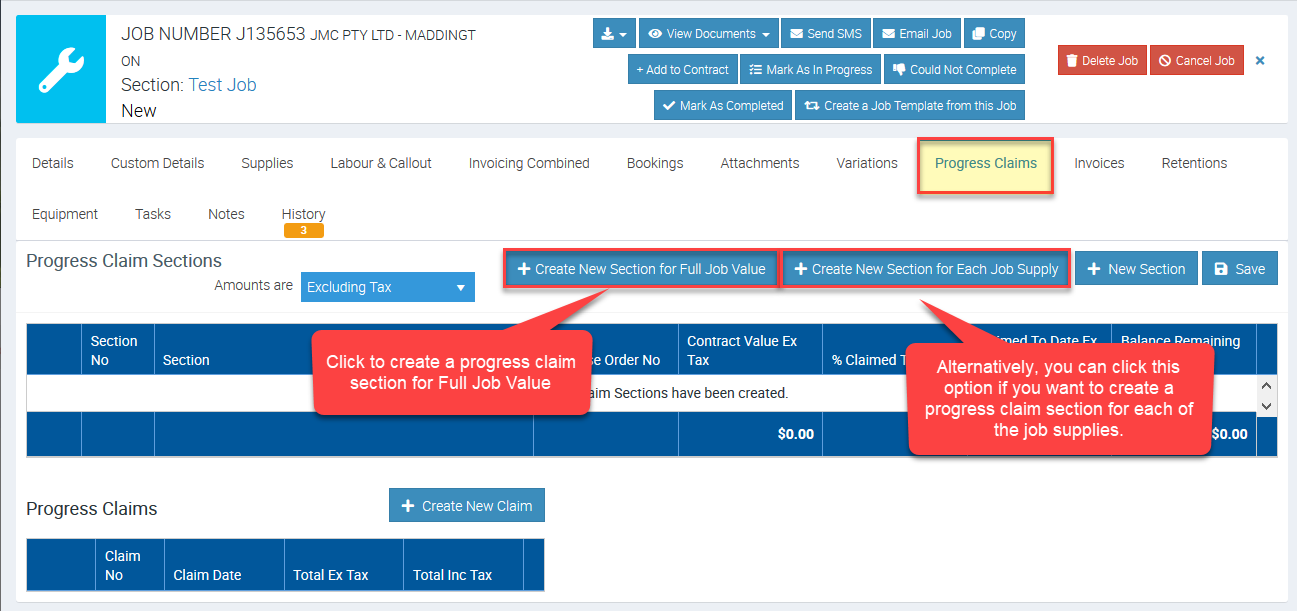
1. On the Job Card, choose the Progress Claims Tab then click the +Create New Section for Full Job Value button.
Alternatively, if you want to create a progress claim section for each of the job supplies, then you can click on + Create New Section for Each Job Supply.
In this example, we select the option to Create New Section for Full Job Value.
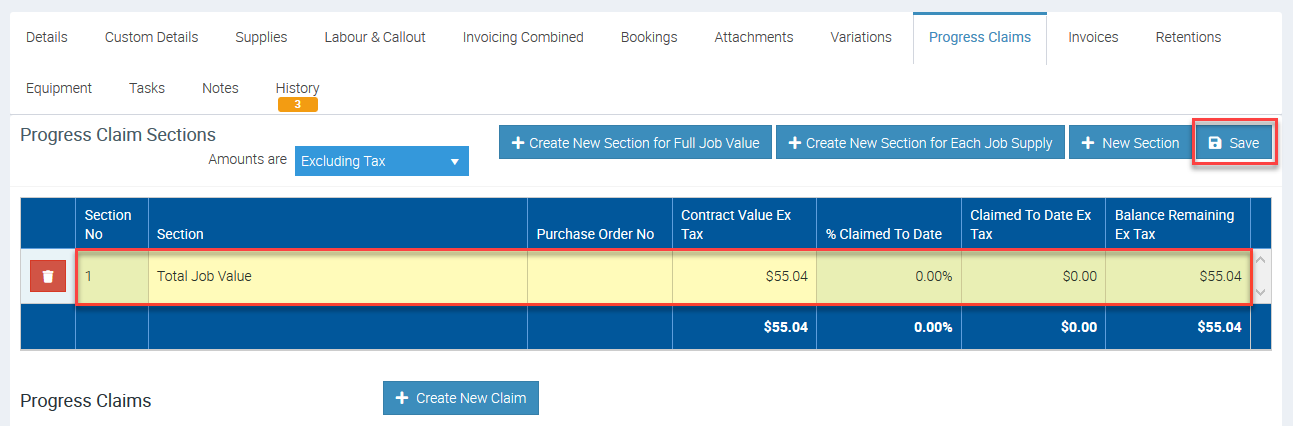
2. A Progress Claim Section for the full Job value will be created and display in the Progress Claim Sections list. If required, you can rename it by clicking on the Section name and editing as needed. When ready, click the Save button.
Generating a Claim against the Progress Claim
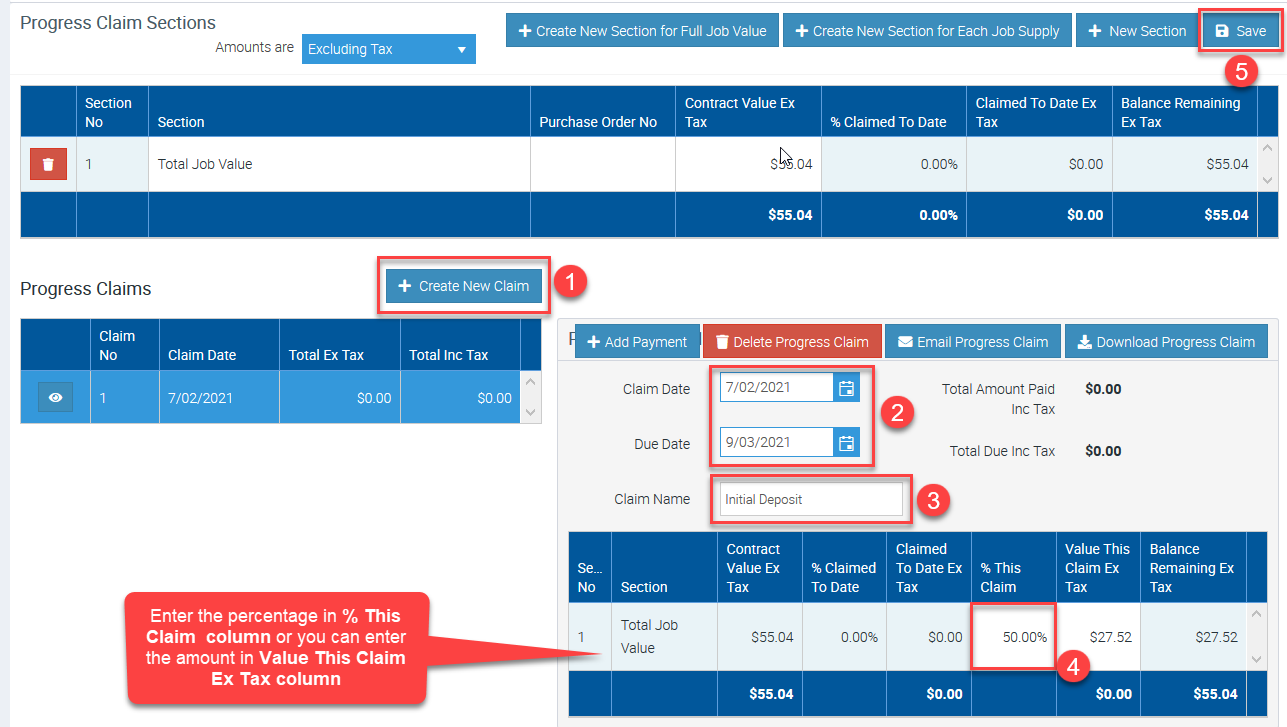
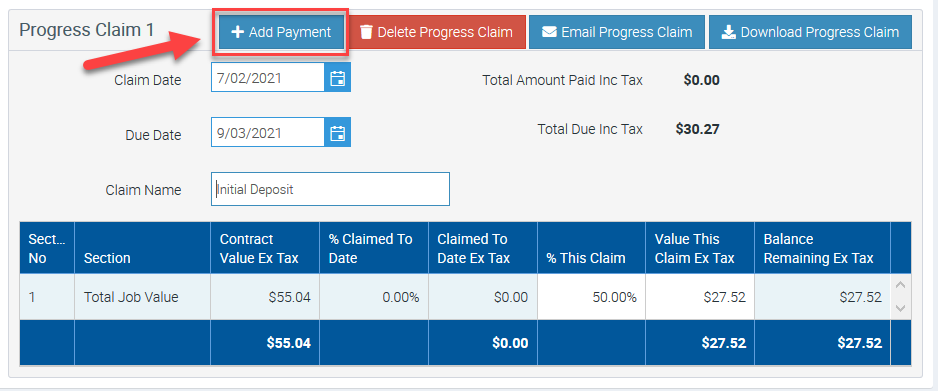
- Click + Create New Claim button to generate a Claim against the Total Job Value Section. The Progress Claim details will display.
- Enter/confirm the Claim Date and Due Date
- Enter the Claim Name by typing in the Claim Name box. For example the Claim name could be "Initial Deposit", "Rough In" or "Fit Off".
- Enter a Percentage or Value for this Claim against the relevant fields for each Progress Claim Section as required.
- Click Save button.
Adding a Payment to a Progress Claim
1. To record a Payment that has been received against the Progress Claim, click the +Add Payment button to display the Add Payment pop-up window and accept a payment immediately in Ascora.
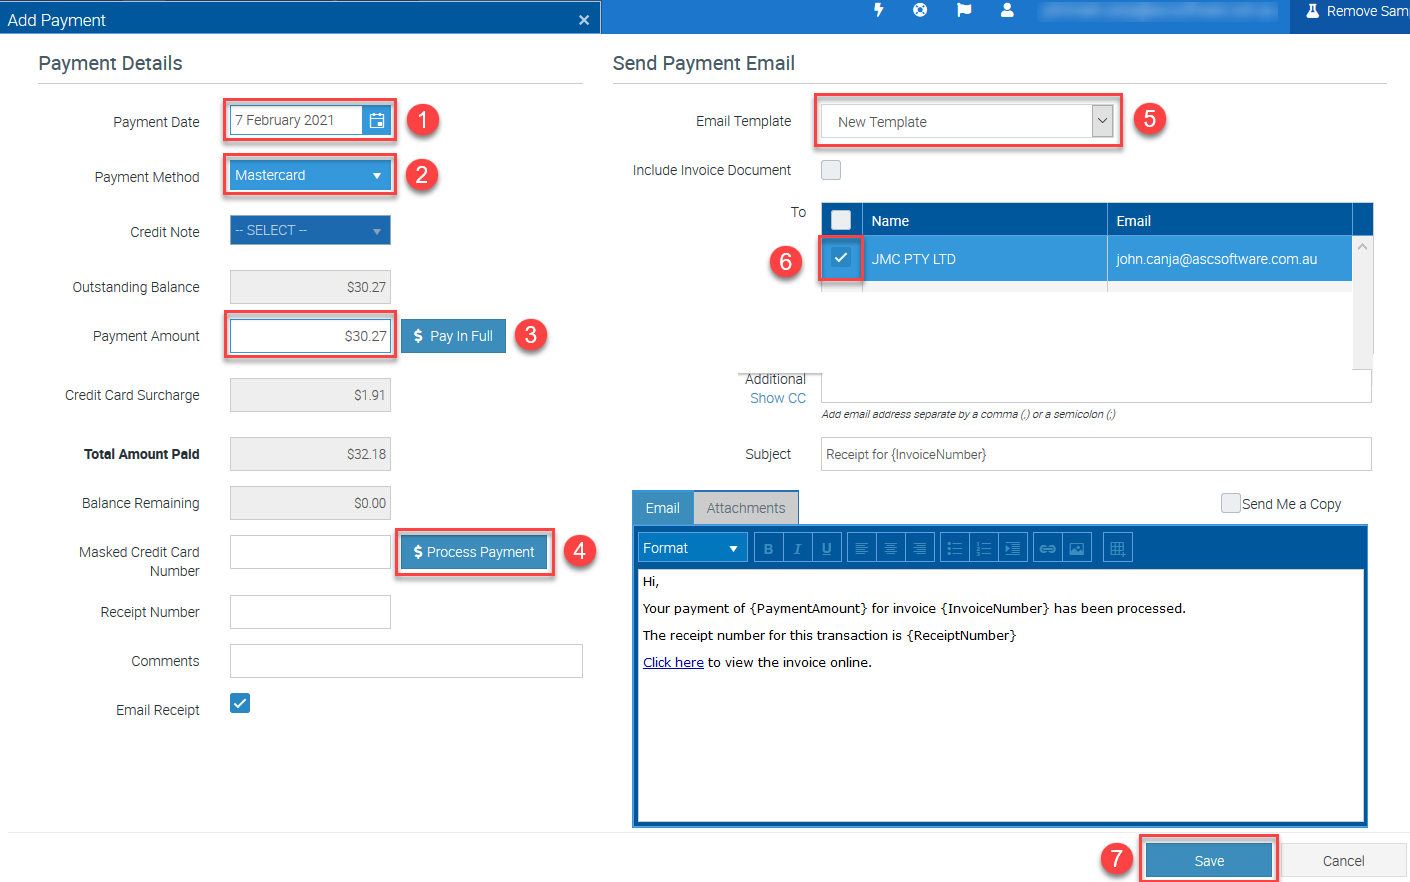
2. Enter the necessary details to process the payment.
- Enter Payment Date
- Select Payment Method
- Enter Payment Amount or click Pay in Full button if full if you are to process a full payment.
- Click Process Payment
- Select your Email Template
- Select the email recipient
- Click Save.
Downloading Progress Claim
1.To download the progress claim, click on Download Progress Claim, select your template, and click Download.
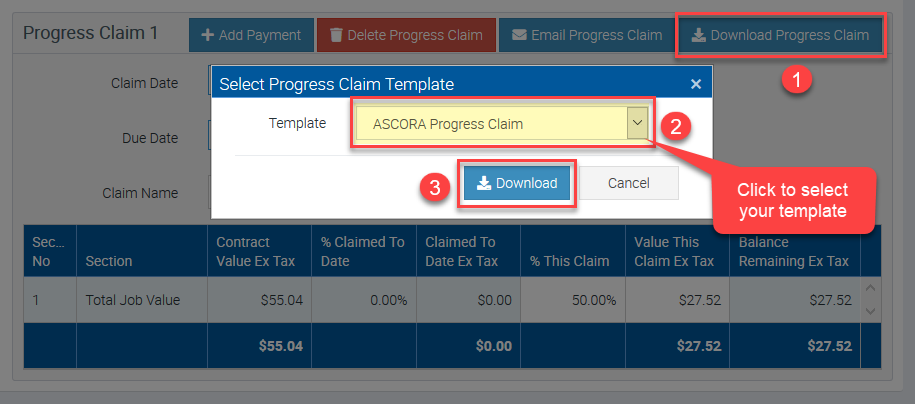
2. Open the downloaded progress claim document to see if all information are accurate and ready to be sent.
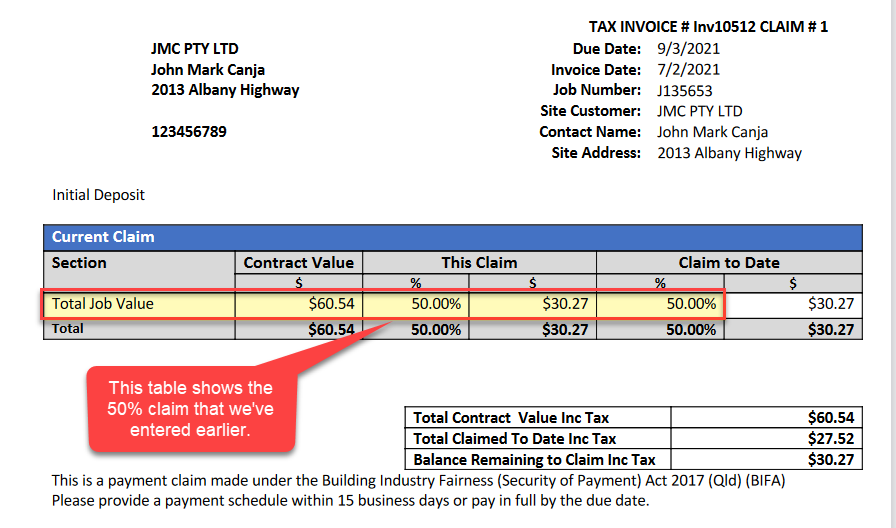
The following image shows a progress claim document that we've generated and it shows the percentage or value of the claim that we've selected which is 50%.
Sending Progress Claim via Email
Once you're ready to send the progress claim to your customer, follow the steps below.
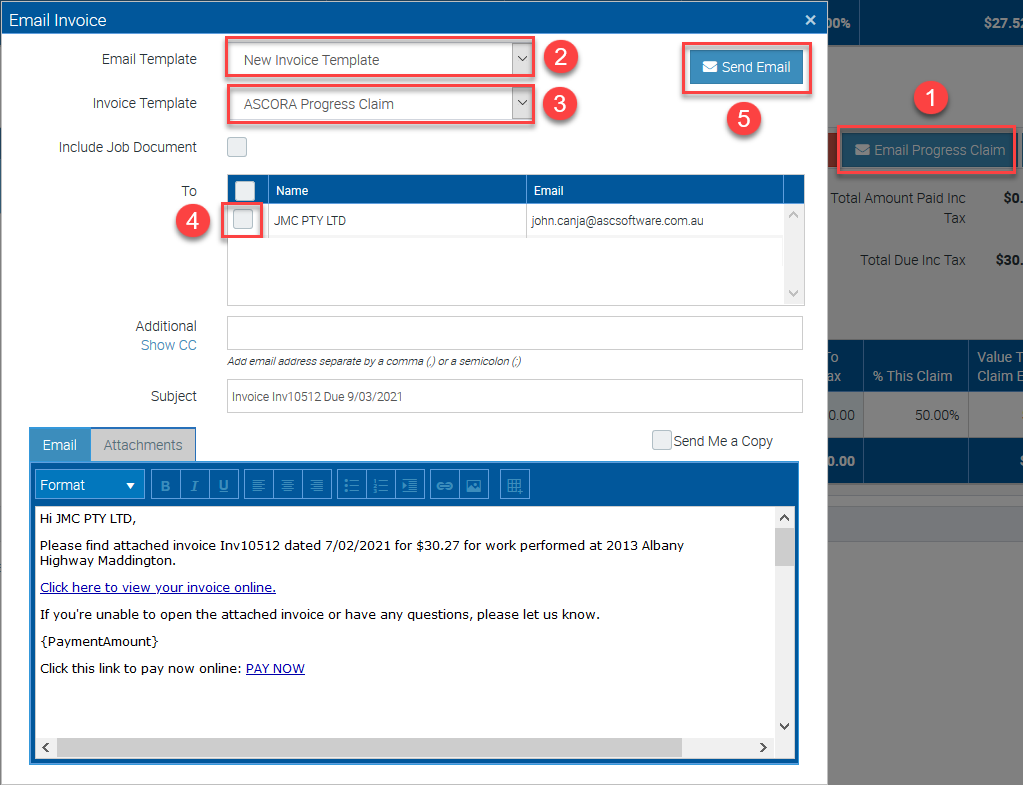
- Click Email Progress Claim
- Select your Email Template. If you need to create one, go to Administration → Email Templates.
- Select your Progress Claim template or invoice template. If you need to create one, go to Administration → Document Templates.
- Select the recipient and your customer's email address will be listed here by default. You can add additional recipients or even send a copy to yourself by using the corresponding fields.
- Once all information are good to go, click Send Email.
Deleting Progress Claim
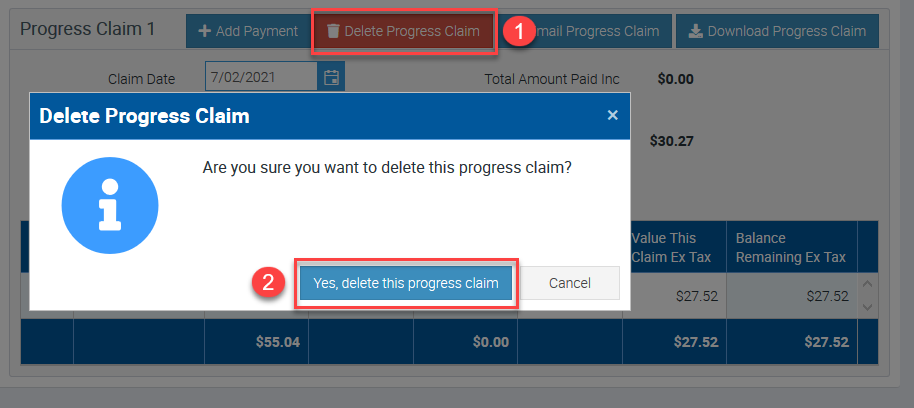
To delete a progress claim section, you must first delete the progress claim associated to that section.
1. To do it, click on Delete Progress Claim button and select Yes, delete this progress claim.
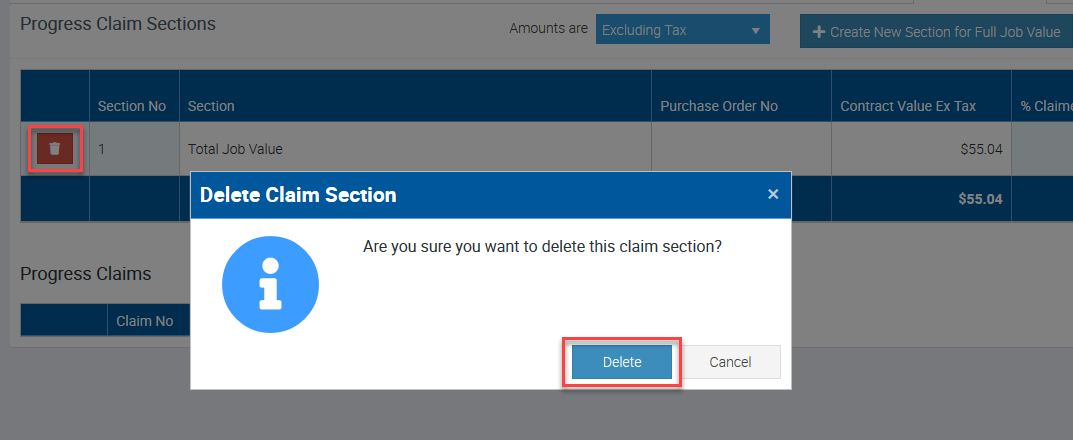
2. You can now delete the progress claim section by clicking the Trash Bin icon and select Delete.