Expenses in Ascora provide a convenient way to record and monitor additional costs associated with a Job that are not typically on-charged to the Customer. These expenses, such as parking fees, meals, or other incidental costs, can be recorded directly within the Job for accurate financial tracking and analysis.
Using Ascora’s expense tracking feature ensures that all costs, even minor ones, are captured, contributing to better financial visibility and job profitability insights. Expenses can also be seamlessly integrated with your accounting system, streamlining bookkeeping and ensuring accurate reporting.
The Supplies Tab within the Job Details provides an intuitive interface to add, review, and manage Expenses, offering features like attaching receipts, linking to accounting expense accounts, and viewing real-time expense summaries for each Job. This allows for efficient resource management and enhances your ability to maintain precise financial oversight throughout the project lifecycle.
📽 Watch the video guides ⤵
Mobile Guide
Access the Job Card
- Navigate to the Jobs Icon in the Top Menu to display the Jobs List.
- Select the applicable Job from the list to open the Job Card.
Locate the Supplies Tab
- Choose the Supplies Tab on the Job Details screen and scroll down to the Expenses section.
- Click the +Add Expenses button to open the New Expense pop-up window.

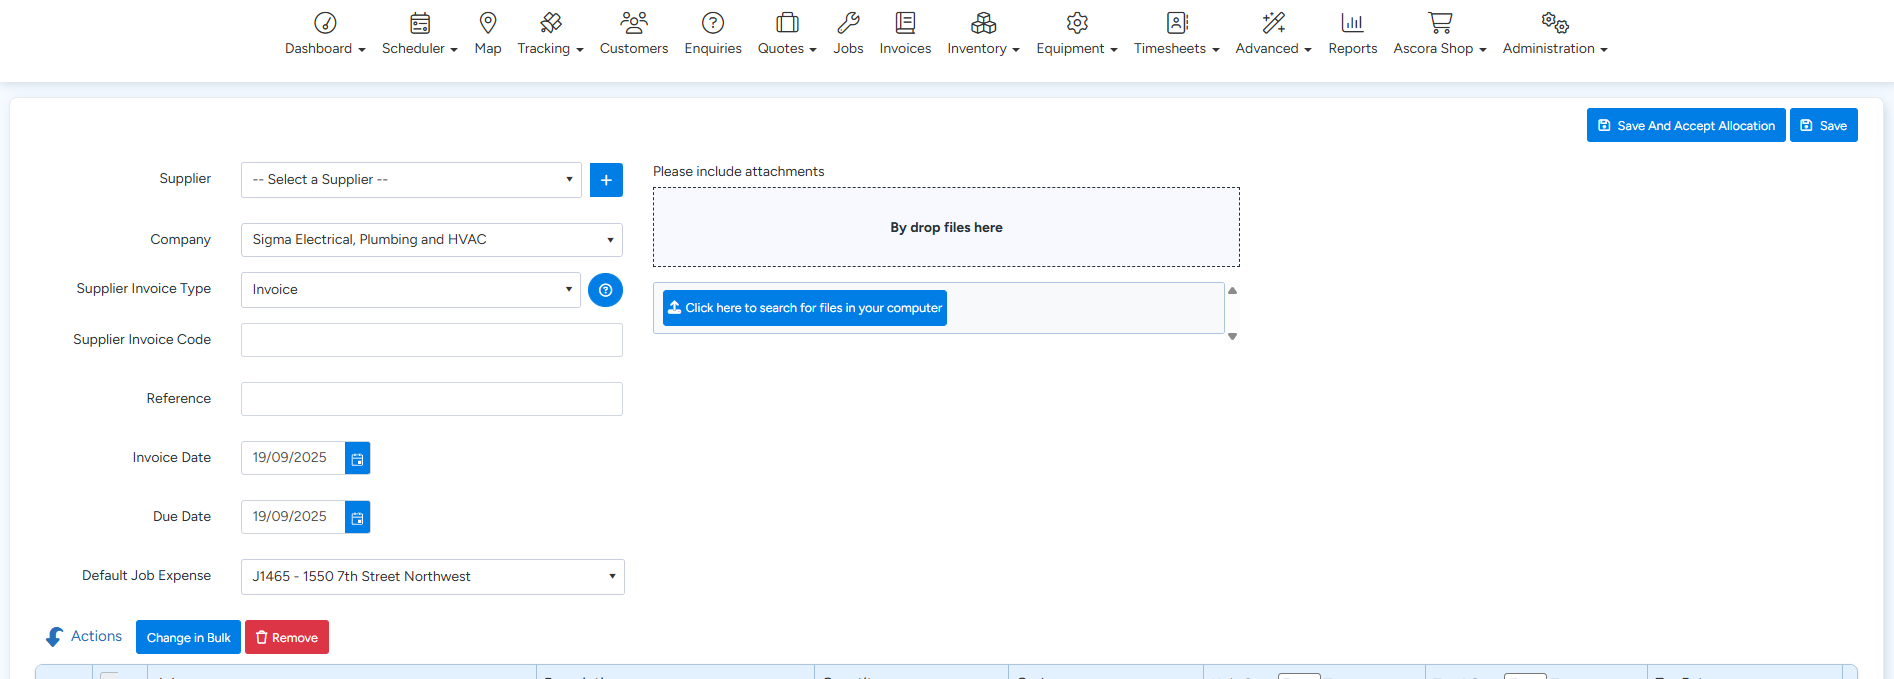
The New Expense pop-up window will appear. Fill in the required fields to ensure the expense is accurately recorded and aligned with your job and accounting needs:
- Select a Supplier: Choose the appropriate Supplier from the dropdown list. If the Supplier is not available, ensure it is added via the Suppliers module.
- Expense Account (if integrated): For users integrated with an accounting package (e.g., Xero), select the relevant Expense Account from the dropdown. This will align the expense with your accounting system’s chart of accounts.
- Invoice Number: Enter the invoice number associated with the expense for proper tracking and reconciliation.
- Invoice Date and Due Date: Specify when the expense was incurred and its due date for timely record-keeping.
- Attach Supporting Documents: Attach a file such as a receipt or invoice by clicking the file upload option. This is especially helpful for expense verification or auditing purposes.
- (Note: Attached files will automatically sync to your accounting package if integrated with Xero or similar systems.)
- Description: Add a clear, concise description of the expense to ensure it’s easily identifiable.
- Quantity and Cost: Enter the quantity and specify whether the cost is inclusive or exclusive of tax. You can choose between entering a Unit Cost or a Total Cost, depending on the nature of the expense.
Here’s an example of the New Expense pop-up:
Save the Expense
After entering all the required details, click the Save button. The expense will now be recorded and displayed in the Expenses section of the Job Details.
Real-Time Financial Overview
Once added, the Financial Summary on the Job Details screen will automatically update to reflect the new expense. This includes:
- Total Job Expenses
- Labour Costs
- Material Costs
This real-time tracking allows you to monitor job profitability and resource allocation effectively.
Additional Tips for Optimizing Expense Management:
- Categorization: Use clear and consistent descriptions for easier tracking and reporting.
- Audit Trails: Always attach supporting documents to maintain a comprehensive record for future reference.
- Timeliness: Record expenses promptly to ensure your financials are up-to-date and accurate.
Got a question?
Submit an Idea 💡 Go to Ideas Portal