The Enquiries feature in Ascora allows you to capture customer inquiries directly from your website or shared links, making it easier to convert them into Quotes or Jobs as needed.
You can customize how your Enquiry Page looks, style automated responses, and manage how inquiries integrate with your workflow.
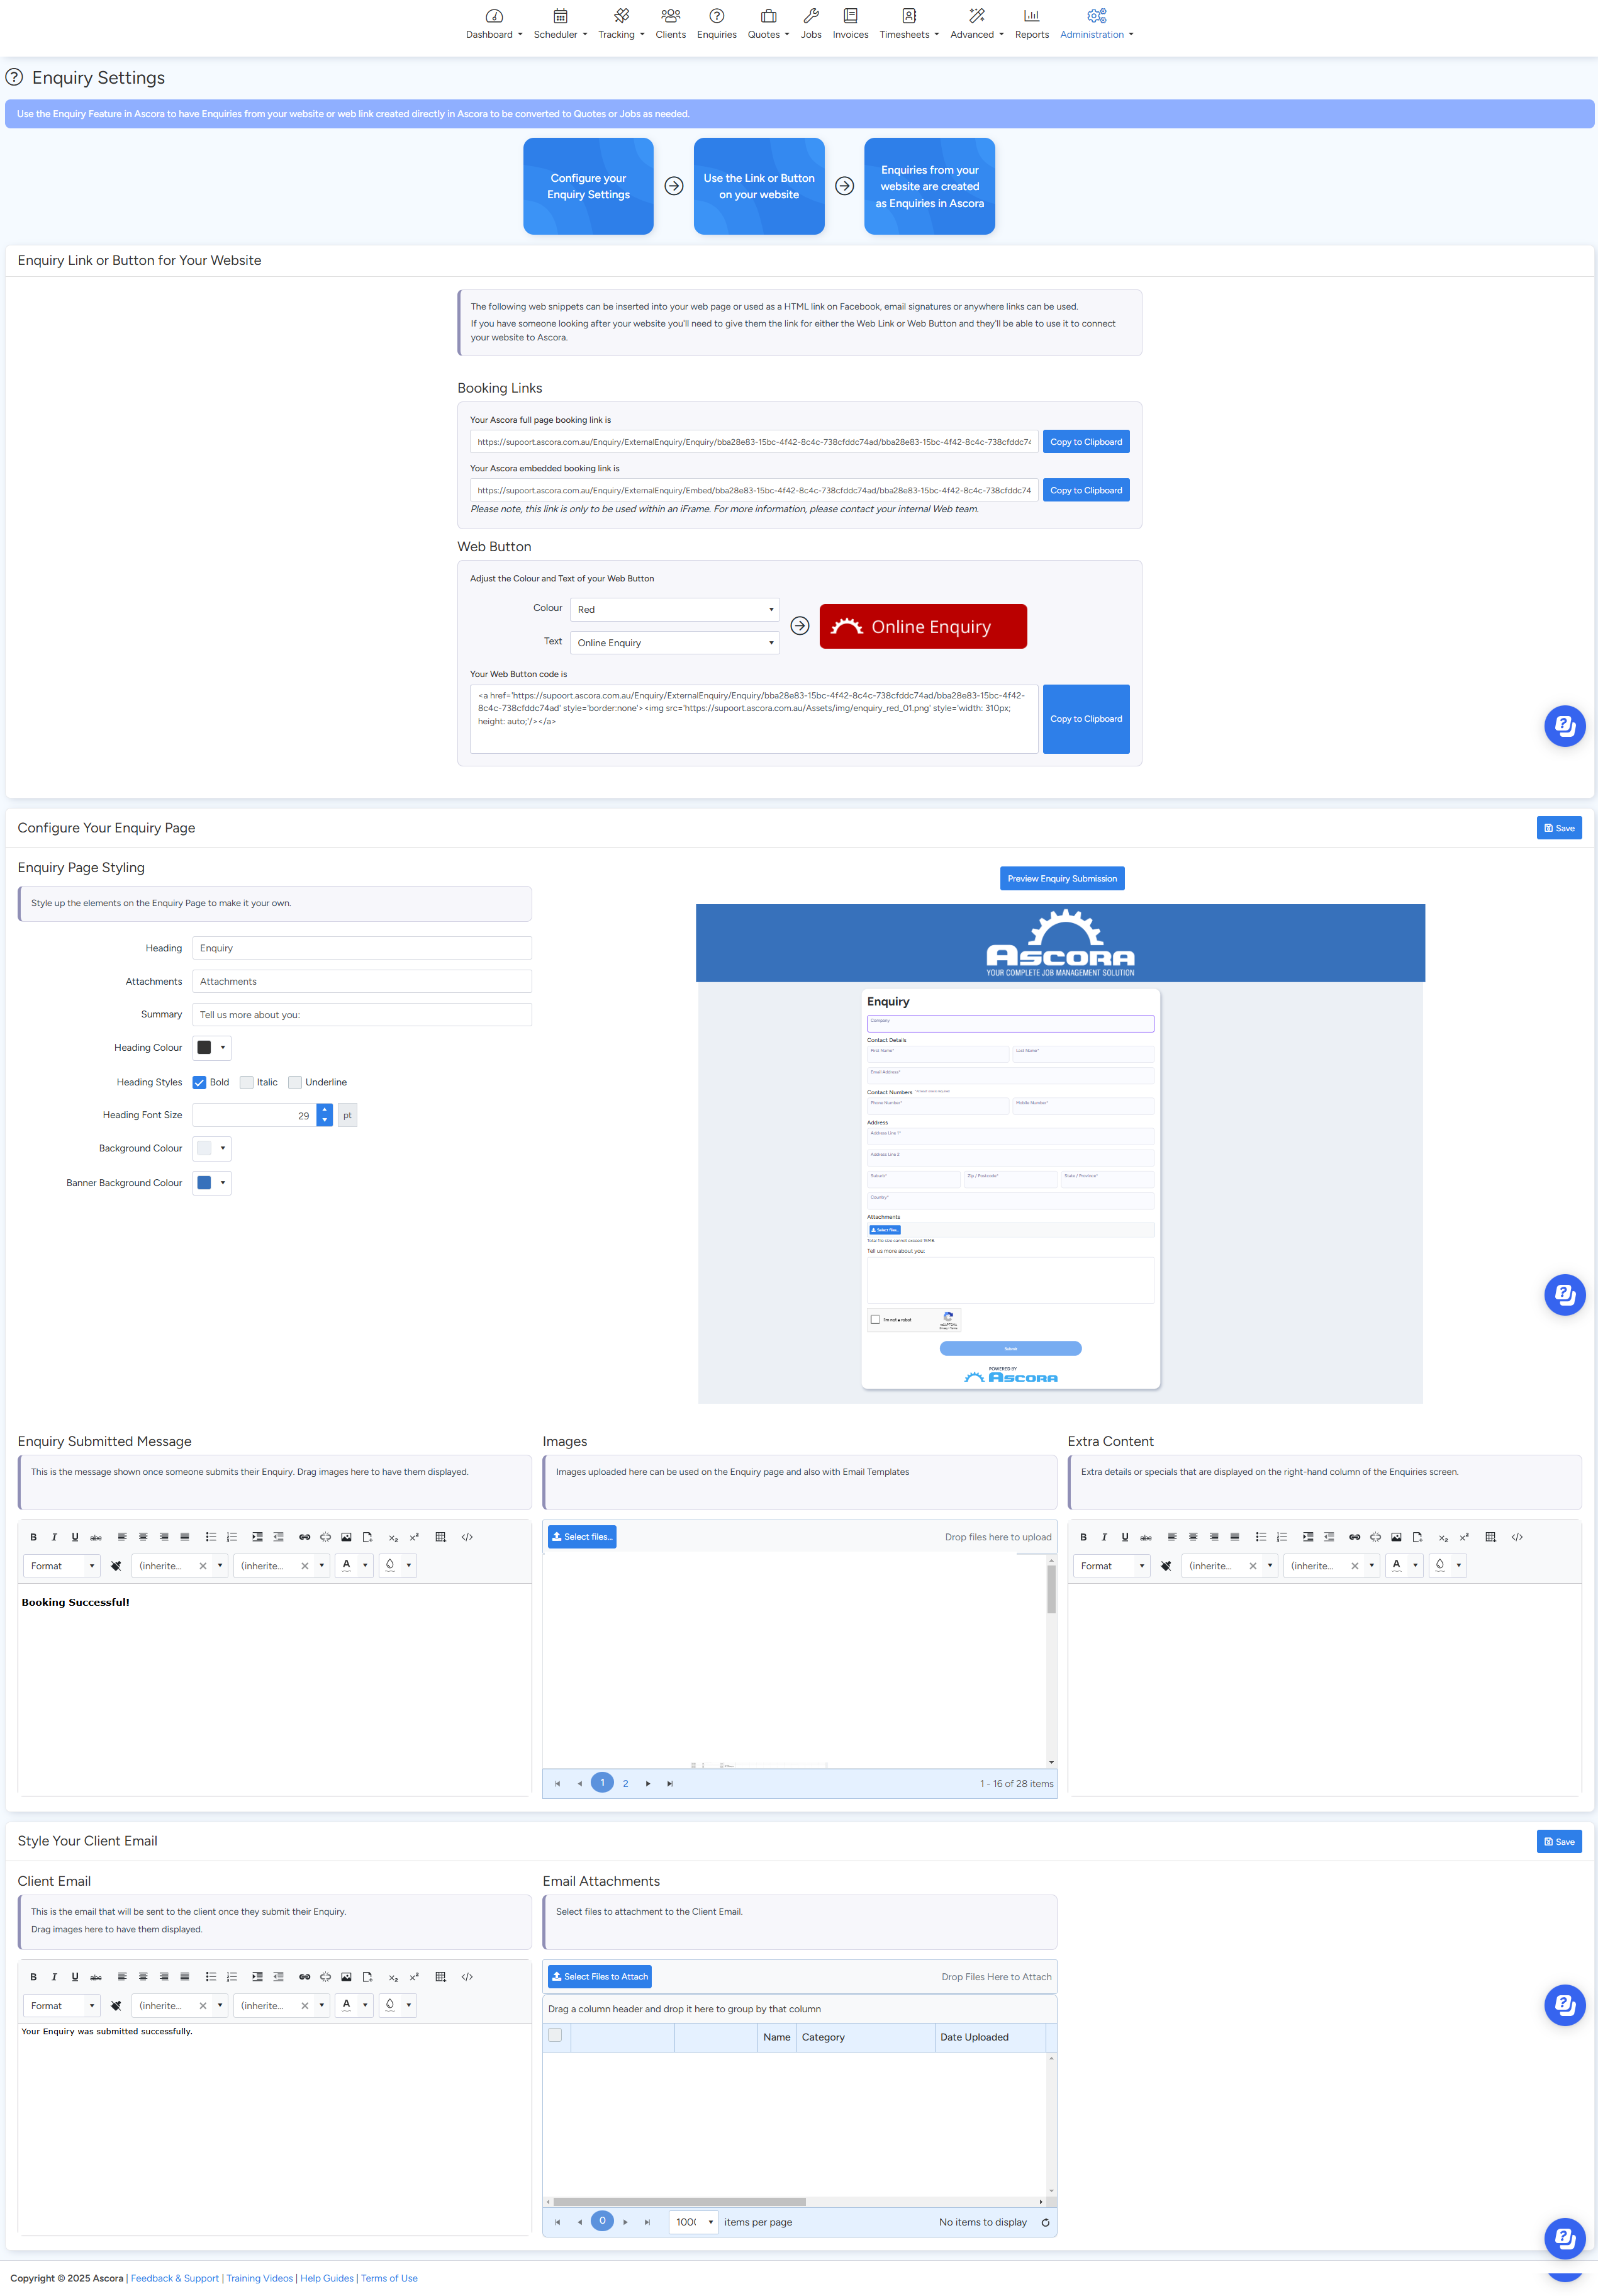
Setting Up the Enquiry Link or Button for Your Website
Ascora provides a web snippet that allows inquiries to be submitted from your website, Facebook page, or email signatures. This ensures all incoming leads are automatically logged in Ascora.
How to Set Up the Enquiry Link/Button:
- Go toAdministration → Enquiries.
- Locate the Web Snippet section.
- Copy the provided Web Link or Web Button code.
- Share the link or embed the button on your website, Facebook page, or in email signatures.
If a web developer manages your website, provide them with the link or button code to integrate it smoothly.
Configuring Your Enquiry Page
Customize the appearance of your enquiry form to match your brand.
How to Customize the Enquiry Page:
- Go toAdministration → Enquiries.
- Scroll to the Configure Your Enquiry Page section.
- Adjust colors, styles, and font sizes to match your branding.
- Upload images to enhance the page's visual appeal.
✅ Tip: Keep colors and fonts consistent with your brand to maintain a professional look.
Customizing the Enquiry Submission Message
This message is displayed after a customer submits an enquiry, confirming their request has been received.
How to Set the Submission Message:
- Go toAdministration → Enquiries.
- Locate the Enquiry Submitted Message section.
- Enter the text you want to display after submission.
- Drag and drop images if you want to include visuals.
Example Message:
"Thank you for your enquiry! A member of our team will be in touch shortly."
Managing Images for Enquiries & Email Templates
Images uploaded in this section can be used on your Enquiry Page and in automated email responses to customers.
How to Upload Images:
- Go toAdministration → Enquiries.
- Locate the Images section.
- Drag and drop images or click Upload to add them.
Adding Extra Content (Promotions or Additional Information)
This section allows you to display special offers or extra details in the right-hand column of the Enquiries page.
How to Add Extra Content:
- Go toAdministration → Enquiries.
- Scroll to the Extra Content section.
- Enter details such as promotional offers, service highlights, or contact information.
✅ Tip: Use this space to highlight current discounts or key business services.
Styling the Client Email Response
When a customer submits an enquiry, an automated confirmation email is sent to them. This section allows you to style and format that email.
How to Customize the Client Email:
- Go toAdministration → Enquiries.
- Find the Style Your Client Email section.
- Adjust text formatting, layout, and images.
- Ensure the email includes a professional greeting, enquiry confirmation details, and contact information.
✅ Best Practice: Personalize the email with the customer's name and a thank-you message to make it more engaging.
Summary & Best Practices
- Integrate the enquiry link/button into your website, email signatures, and Facebook page.
- Customize the enquiry page with your brand’s colors, fonts, and images.
- Set a clear confirmation message to reassure customers their enquiry has been received.
- Upload images for a more professional look.
- Use the Extra Content section for promotions or key information.
- Customize the email response to enhance customer engagement.
Got a question?
Submit an Idea 💡 Go to Ideas Portal