Ascora allows you to enhance your Custom Forms by integrating essential job-related details such as Timesheets, Labour, and Supply information. This feature ensures that all job records are comprehensive, reducing manual data entry and improving reporting accuracy.
This guide will cover:
- How to add Timesheet details to a Custom Form
- How to include Labour details in a Custom Form
- How to capture Supply details in a Custom Form
- How to test the updated form in the Ascora mobile app
By following these steps, you can automate data collection for job-related resources, making it easier for technicians and staff to track work hours, costs, and materials used on each job.
📽 Watch the video guide ⤵
Downloading Custom Form Template
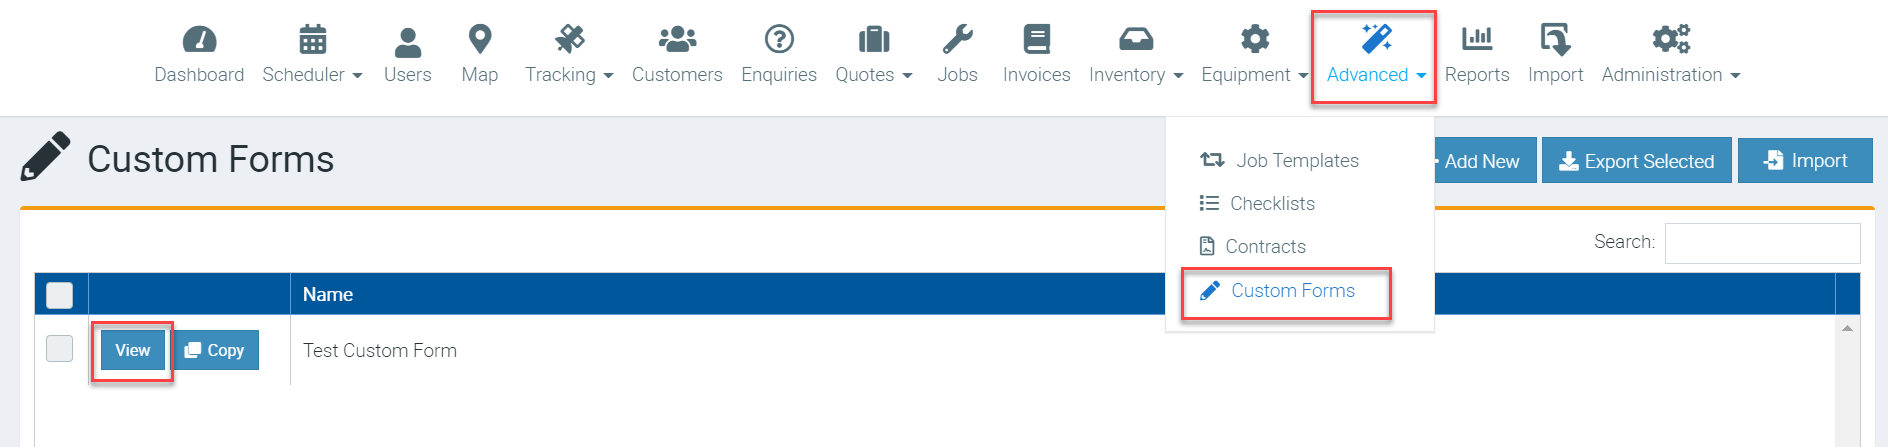
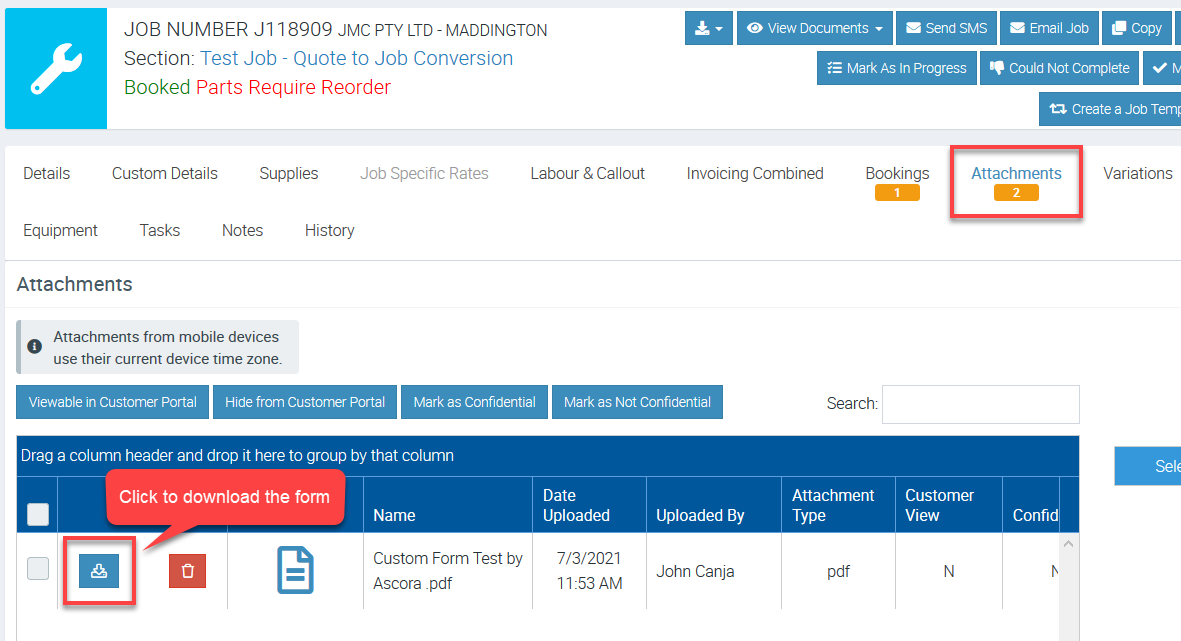
1. Download your custom form by going to Advanced → Custom Forms and click View beside the Custom Form Name which is basically the form that you need to update.
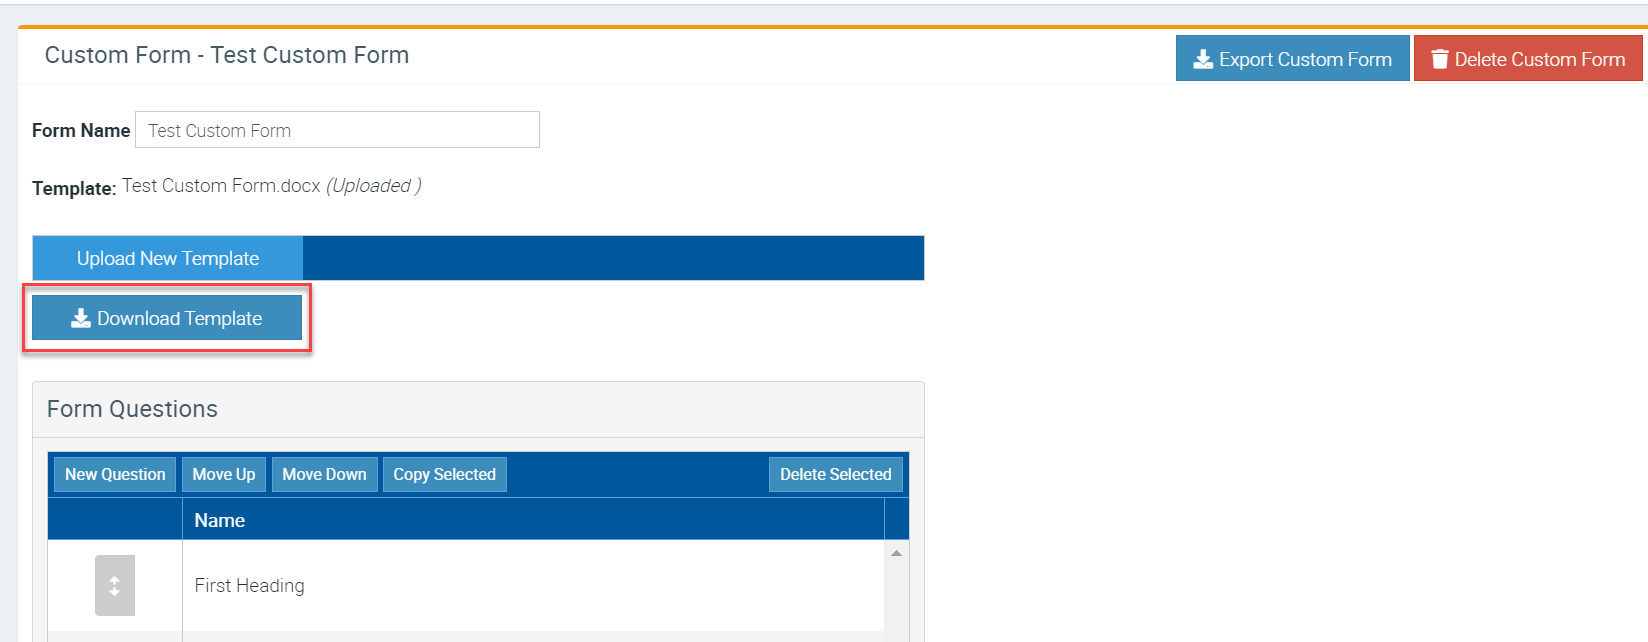
2. Click Download Template and it will download the Word Document file which you can edit and in this instance, we will add field codes to capture timesheet, labour, and supply details.
Adding Timesheet Details
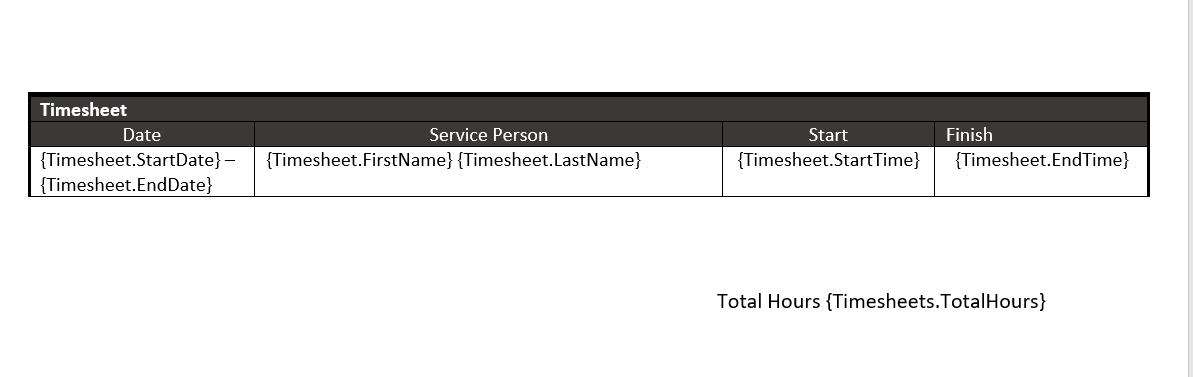
1. Open the Word Document template that you've downloaded and add a table with the required field codes to capture timesheet details.
Field Codes to use
{Timesheet.Details}
{Timesheet.Duration}
{Timesheet.EndDate}
{Timesheet.EndTime}
{Timesheet.FirstName}
{Timesheet.LastName}
{Timesheet.MealBreak}
{Timesheet.StartDate}
{Timesheet.StartTime}
{Uniquefiledcode.TotalHours}
Your table should look like the following and you can apply formatting changes as required.
2. After adding the table with timesheet related field codes, save the document so you can upload it back to Ascora.
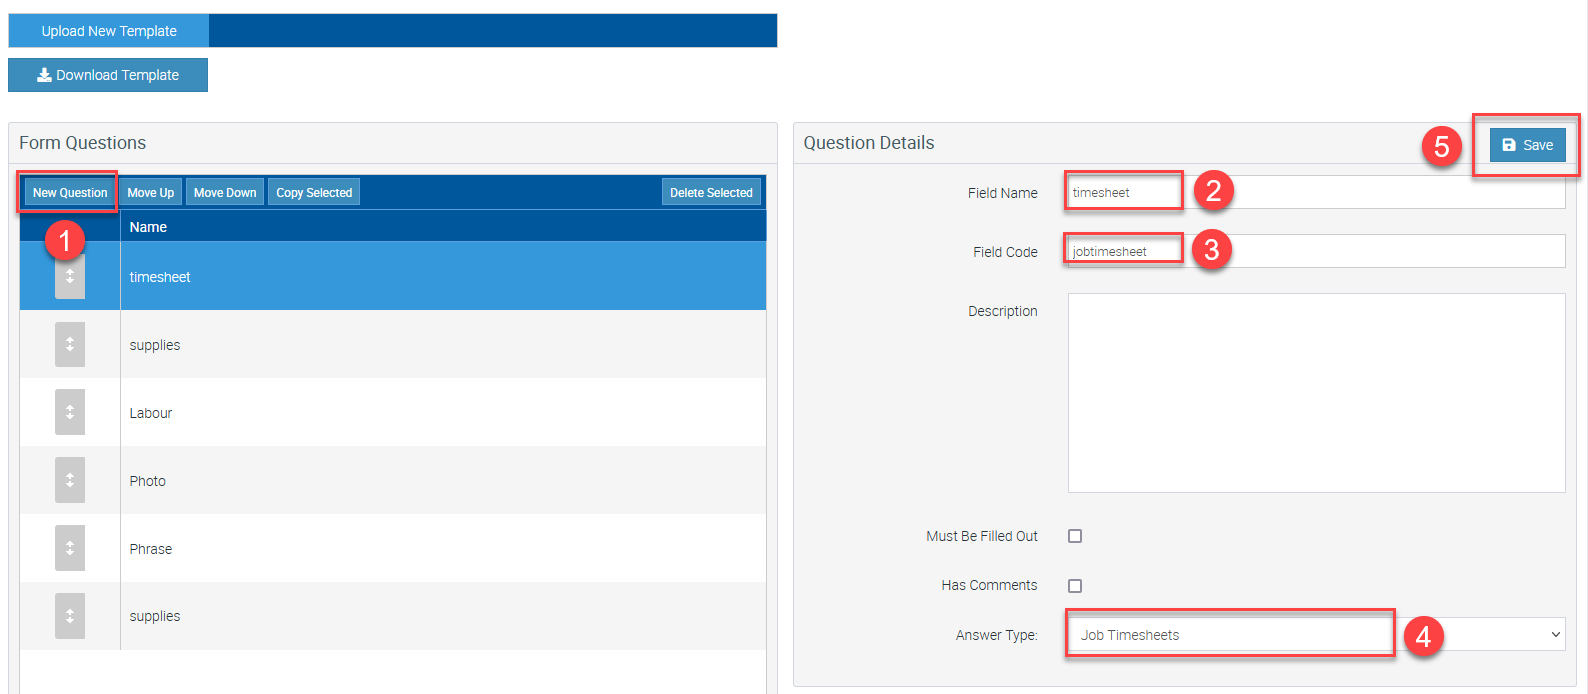
3. Go back to Ascora web Custom Form area and click Upload New Template then click Save.
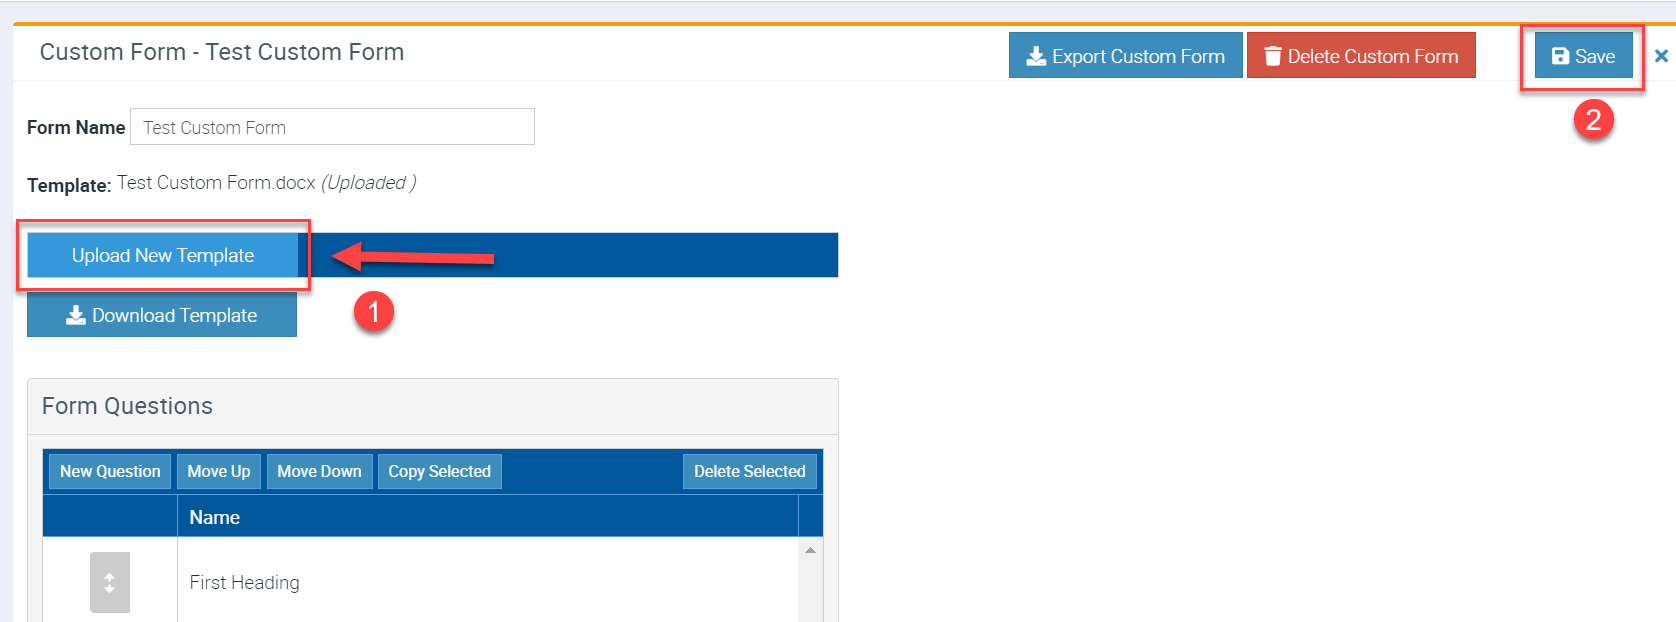
4. Add a custom form question and assign a unique field code and select "Job Timesheets" as the answer type.
Adding Labour Details
1. Open the Word Document template that you've downloaded and add a table with the required field codes to capture labour details.
Field Codes to use
{Labour.Date}
{Labour.FirstName}
{Labour.LastName}
{Labour.HourlyRateExTax}
{Labour.TotalAmountExTax}
Your table should look like the following and you can apply formatting changes as required.

Adding Supply Details
1. Open the Word Document template that you've downloaded and add a table with the required field codes to capture supply details.
Field Codes to use
{Supply.PartNumber}
{Supply.Description}
{Supply.Quantity}
{Supply.Category}
Your table should look like the following and you can apply formatting changes as required.

Testing your Custom Form on your Mobile App
Make sure to do synchronisation first before running a test.
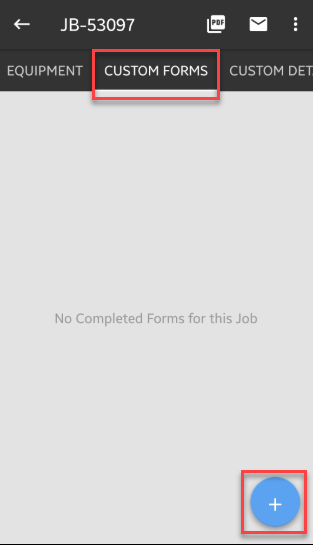
1. Access your job from the mobile app.

2. Navigate to Custom Forms tab and tap the + button and select the form that you are testing.
3. Tap Go button in Timesheets if you're adding timesheet details, and the other Go buttons buttons if you're also adding labour and supply details.
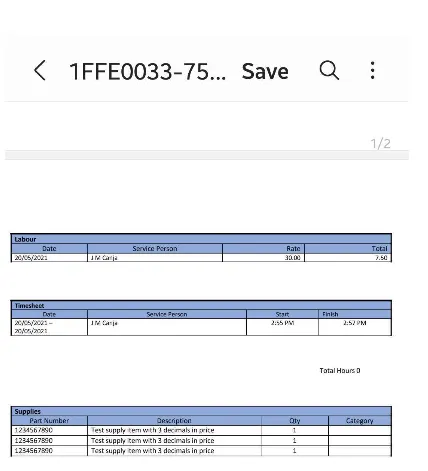
Click Generate and it should create a PDF version.
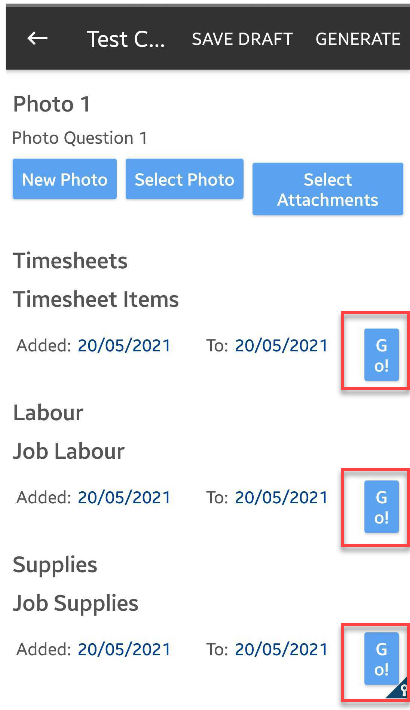
4. After generating the form, you should immediately see timesheet details and also labour and supply details if you've added them.
Got a question?
Submit an Idea 💡 Go to Ideas Portal