Managing allowances effectively ensures your team is compensated accurately for additional expenses or conditions related to their work. Whether it’s a meal allowance, travel reimbursement, parking fee, or hazard pay, allowances can significantly impact payroll accuracy and employee satisfaction.
Ascora provides a seamless way to configure and track allowances, ensuring they are applied correctly across jobs, timesheets, and payroll reports. By leveraging these features, businesses can automate calculations, reduce administrative workload, and improve financial transparency. Properly managed allowances not only ensure compliance with payroll policies but also help maintain accurate cost tracking for financial planning and job profitability analysis.
This guide walks you through:
✅ Creating and assigning allowances to users
✅ Applying allowances to timesheets (via jobs, reporting, or the mobile app)
✅ Tracking allowances in reports for payroll and financial management
Creating Allowances
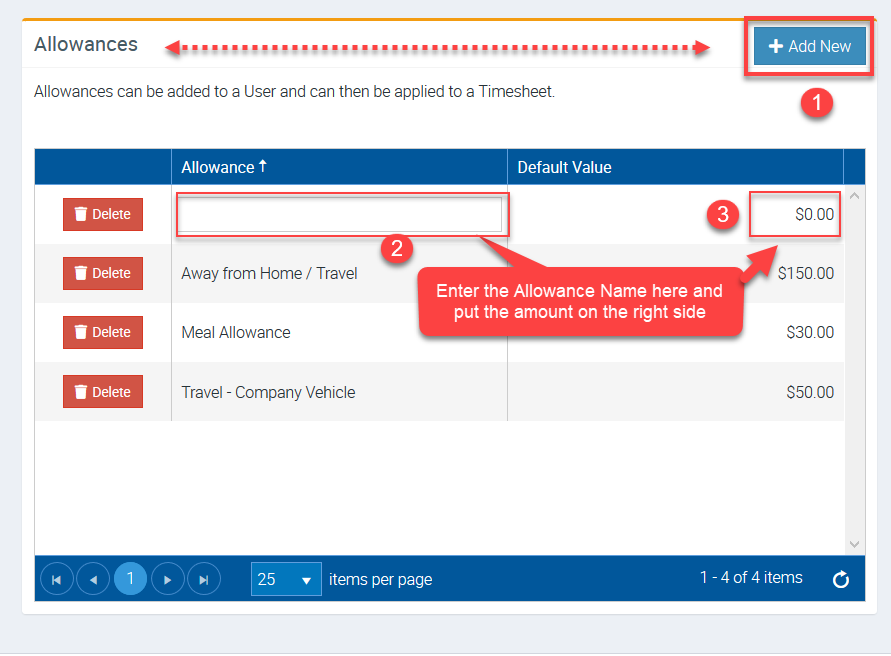
1. Go to Administration → User Lookups.

2. Click Add New located in Allowances area.
Enter the allowance name and enter the corresponding value or amount.
Adding Allowance to a User
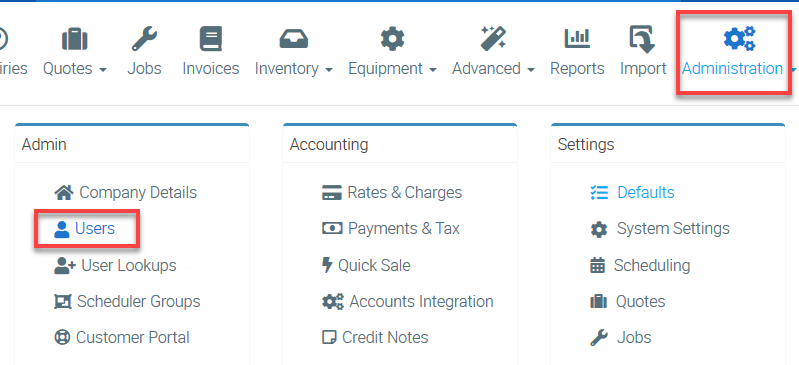
1. Go to Administration → Users and view the user details.
2. Once you've accessed the user details, scroll down and look for Allowances in the left panel and click Add.
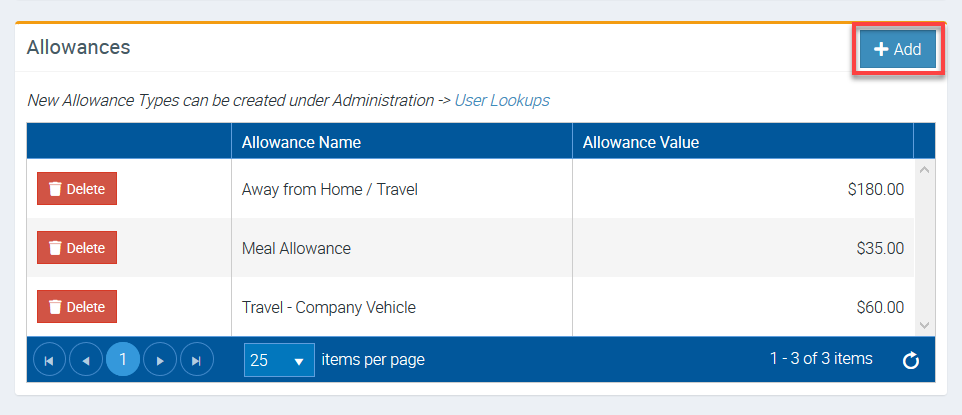
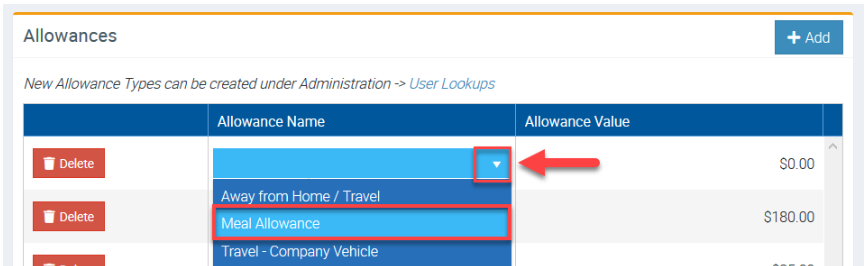
3. Click the little triangle and select from the list of allowances.
In this example, we are adding Meal Allowance to a user.
Adding Allowance from the Job area.
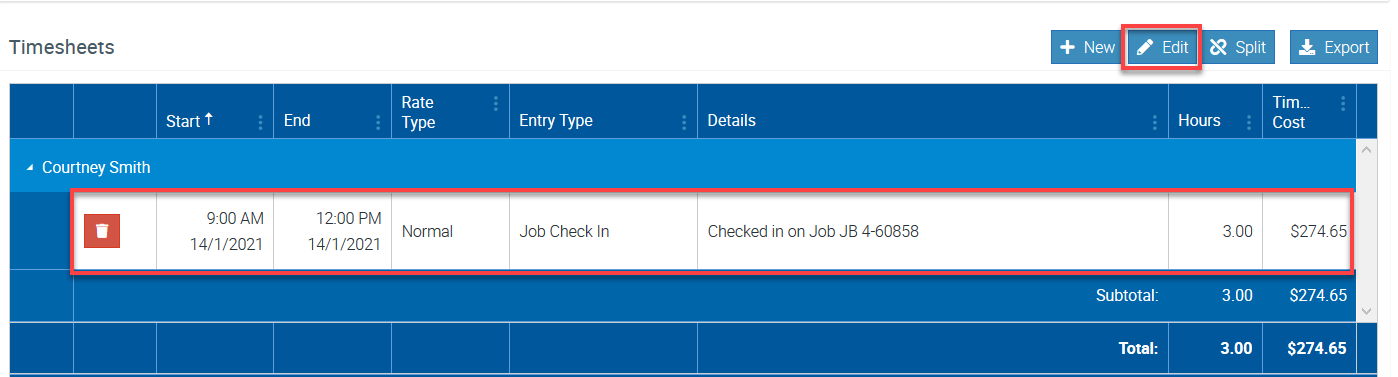
1. Open the Job Details screen and go to Labour & Callout → Timesheets.
Select the Timesheet line item and click Edit.
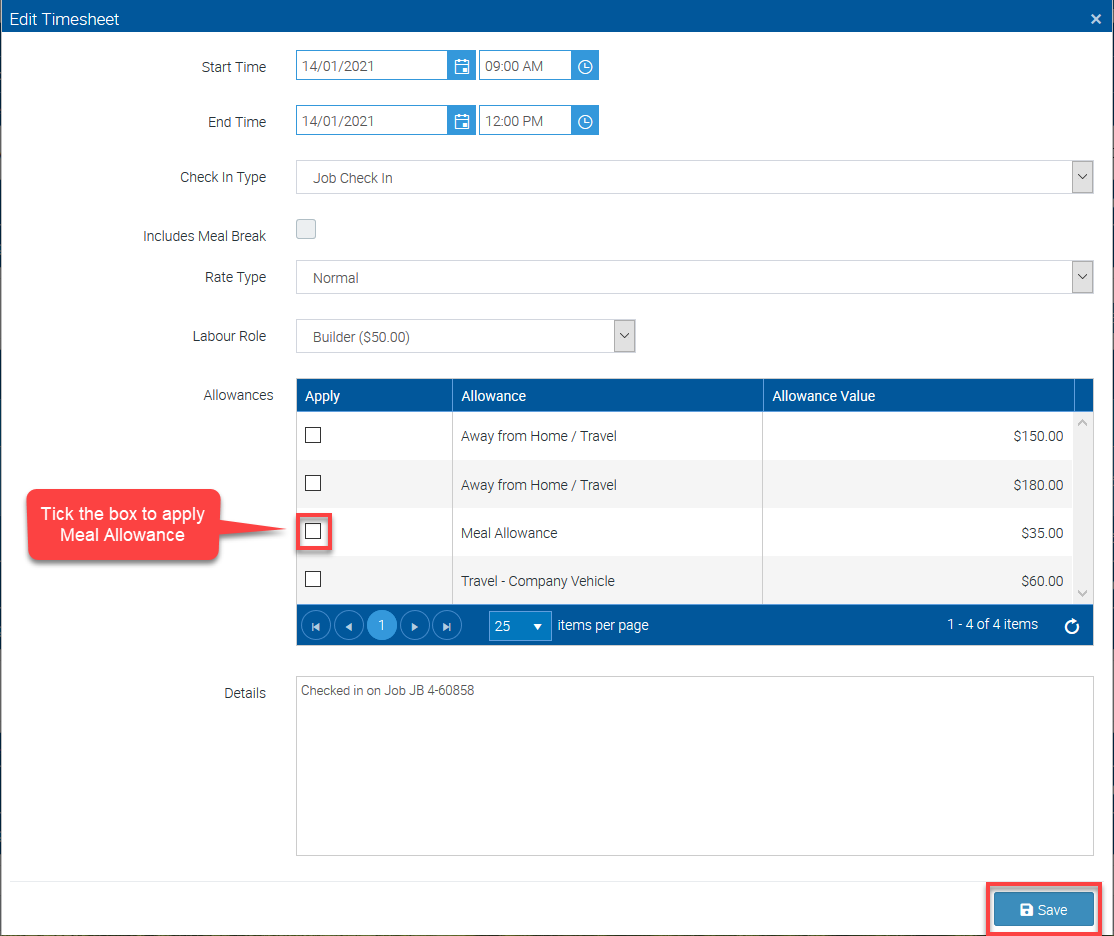
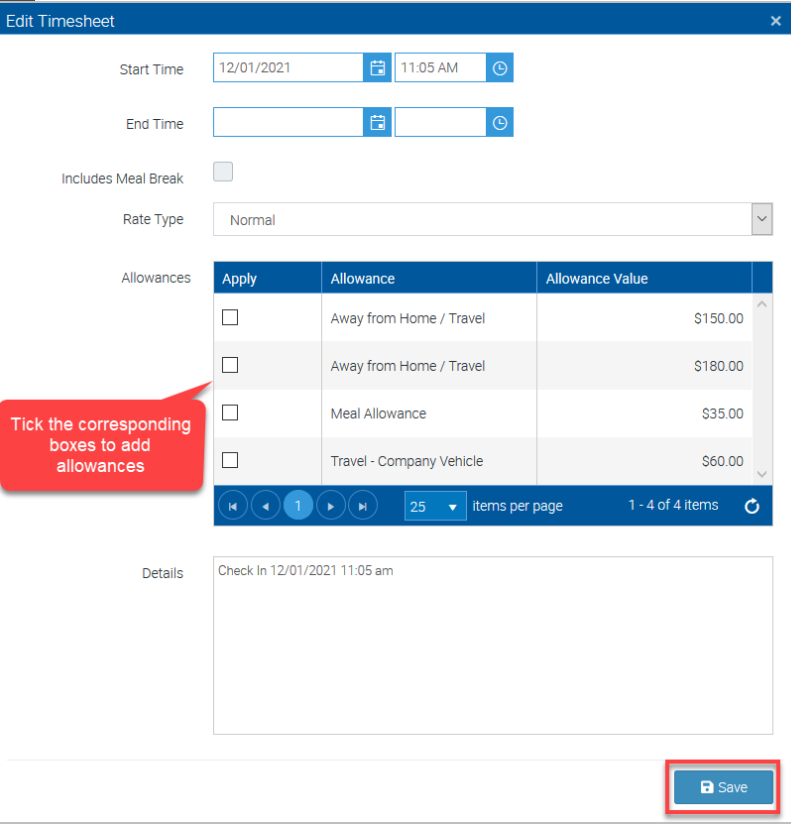
2. A list of allowances will be displayed and to add one, tick the corresponding box and click Save to continue.
In this example, we are adding Meal Allowance but we can add other allowances if applicable by ticking the corresponding boxes.
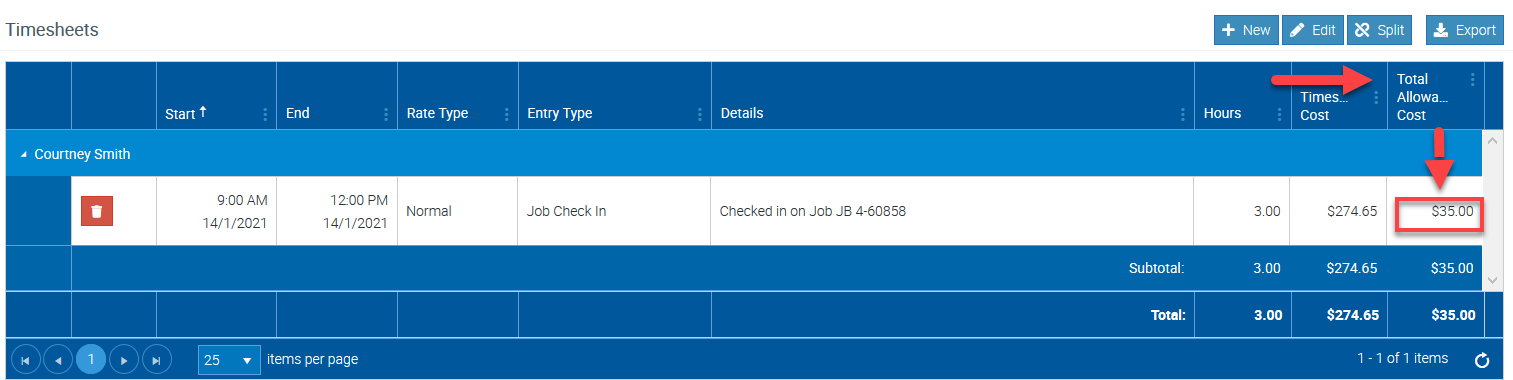
3. You should now see the added meal allowance with amount of $35.00 in the column called Total Allowance Cost.
Adding Allowance from the Mobile App (Android)
1. Tap the Menu icon indicated by the three lines on the upper left part of the screen and select Timesheet.
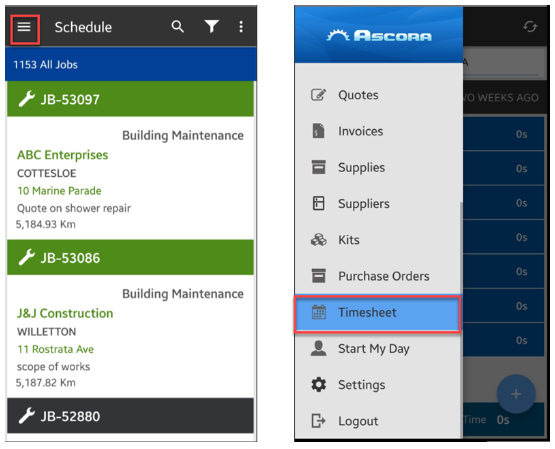
2. Tap the + icon and then tap Select.
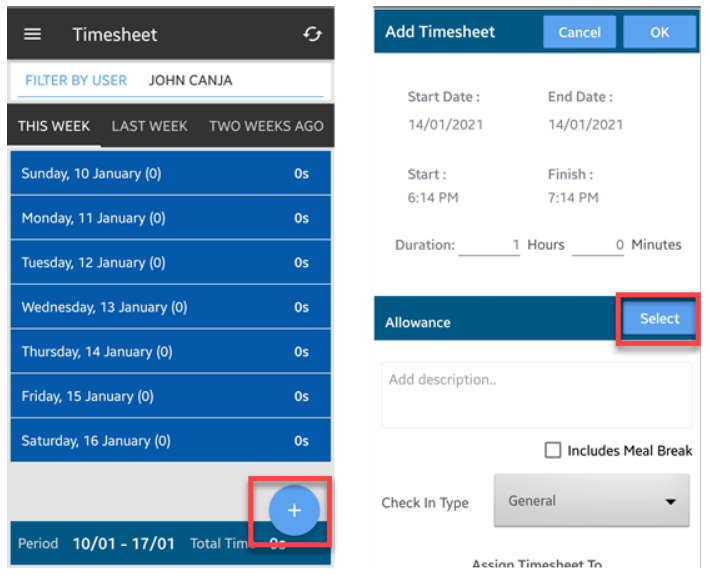
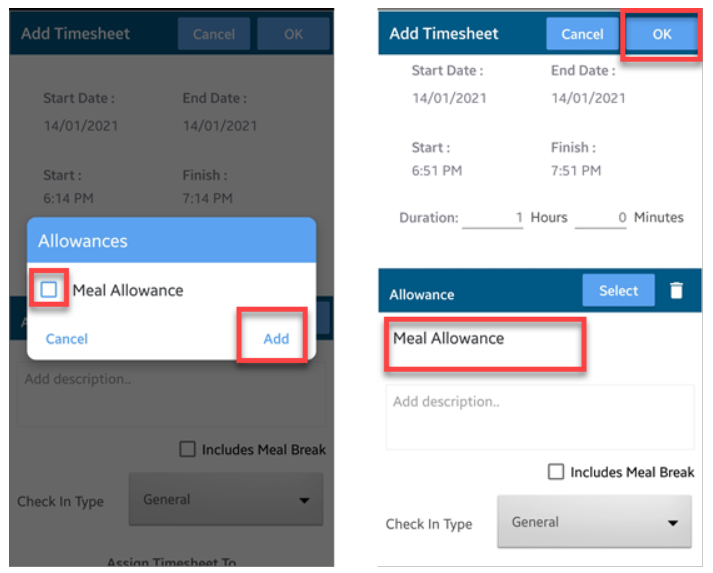
3. Tap the box beside the allowance name and then tap Add. In this example, we are adding Meal Allowance.
A new screen appears where you can see the meal allowance added and to proceed, tap OK.
Adding Allowances from Timesheet Editing
You can also add or remove allowances in the Timesheet Editing report.
1. Go to Reports → Timesheet Editing.
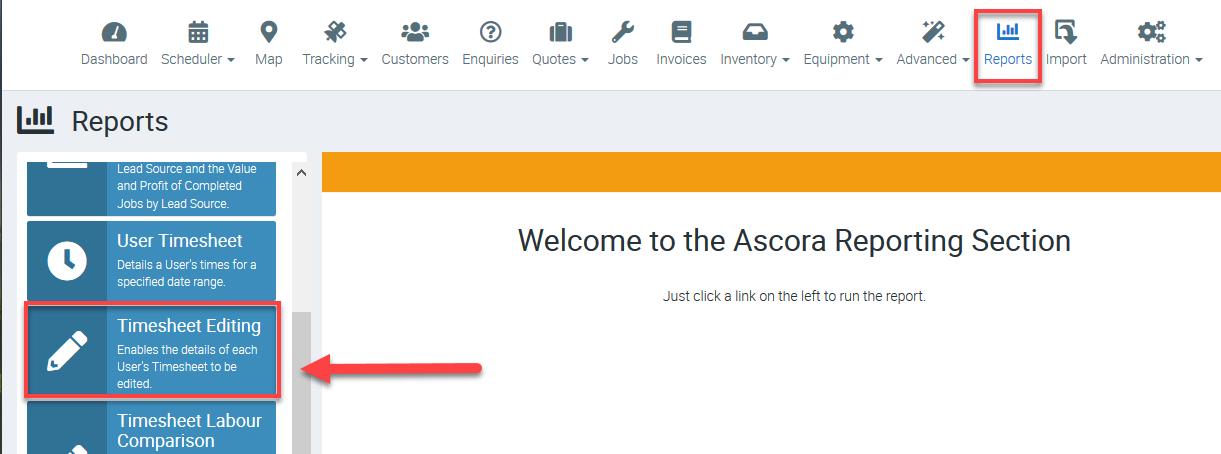
2. Click the Timesheet line item that you need to edit and click Edit.
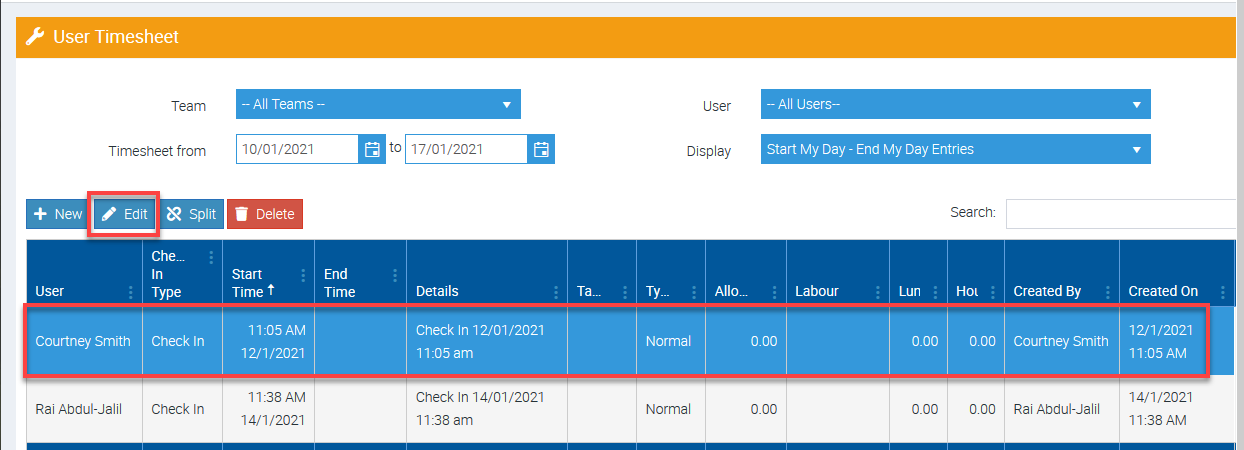
3. You should see the list of available allowances for a particular user and tick the corresponding boxes to add allowances.
To proceed, click Save.
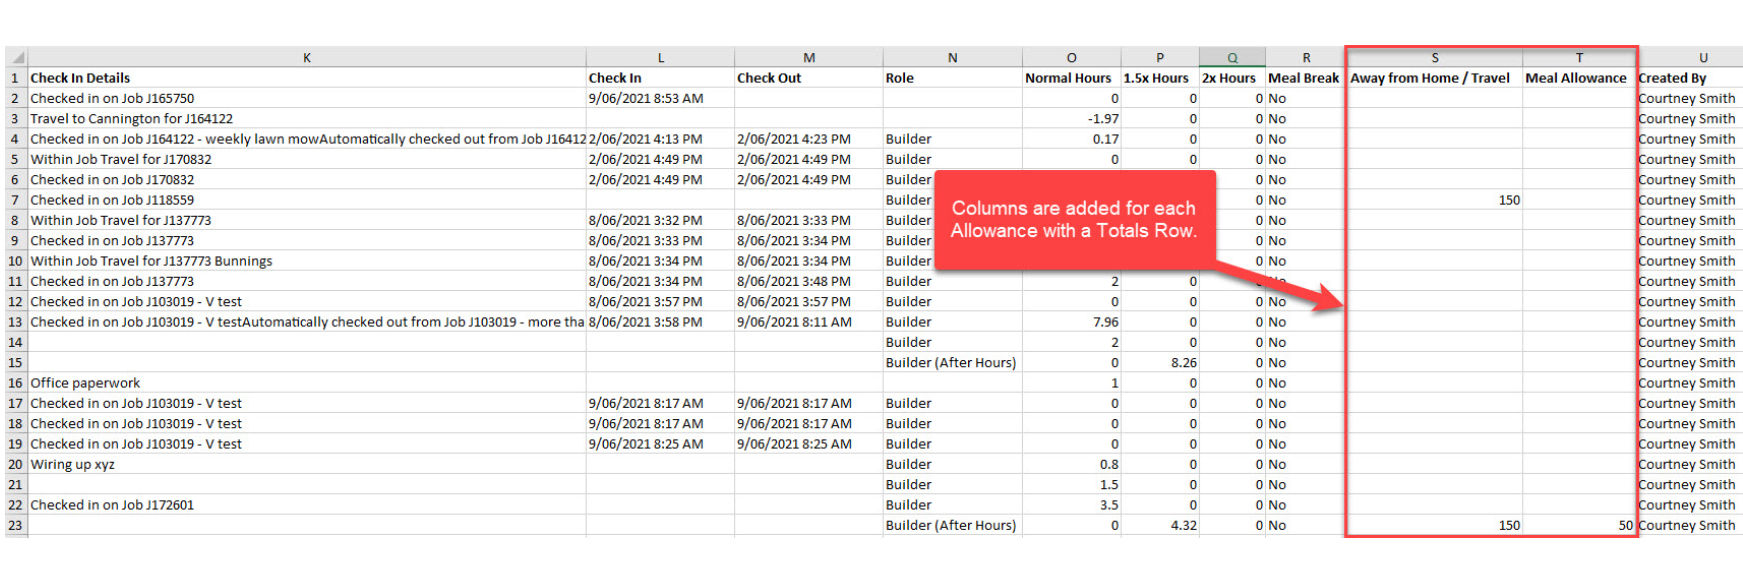
Running a Report to show Allowances
You can use the Timesheet Summary Spreadsheet which contains a column for each Allowance that exists in the data range associated with the export.
1. You can access the Summary Spreadsheet from Reports → User Timesheet → Export Timesheet to Excel.

2. Report will be exported as Excel spreadsheet containing a column on allowances.