Ascora provides three levels of mobile access, allowing businesses to control user permissions and ensure employees have the right tools for their roles. Whether you need team members to only log timesheets, view job details, or have full mobile functionality, Ascora makes it easy to configure access based on your requirements.
By properly setting mobile access levels, you can:
✅ Enhance security by ensuring employees only access the data and features they need.
✅ Improve efficiency by enabling job check-ins, timesheet entries, and mobile job management.
✅ Control costs by assigning the most appropriate access level, avoiding unnecessary expenses.
✅ Streamline operations with clear job visibility and permissions tailored to each user.
This guide walks you through granting, modifying, and managing mobile access permissions, ensuring your team can operate effectively whether they’re in the field or the office.
📽 Watch the video guide ⤵
There are three mobile access levels to choose from which can be enabled in Administration → Users.
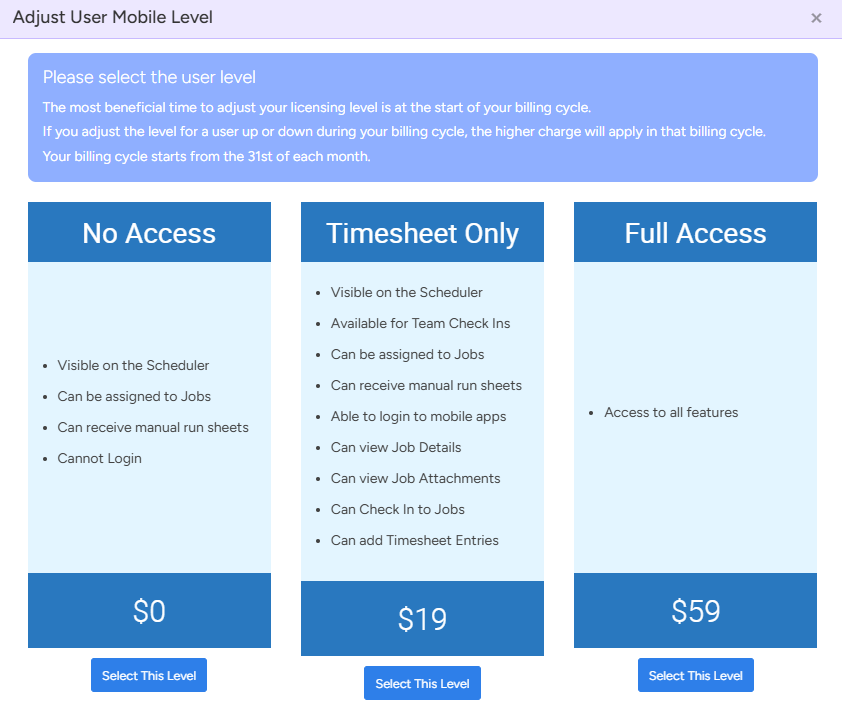
Mobile Access Levels
No Access
- Visible on the Scheduler and you can activate this access if you only want the user to become visible on the Scheduler but not the mobile app.
- Can be assigned to Jobs
- Can receive manual run sheets
- Cannot Login
Timesheet Only
- Visible on the Scheduler
- Available for Team Check Ins
- Can be assigned to Jobs
- Can receive manual run sheets
- Able to login to mobile apps
- Can view Job Details
- Can view Job Attachments
- Can Check In to Jobs
- Can add Timesheet Entries
Full Access
- Access to all features
Below image shows the 3 types of mobile access levels and their corresponding cost per month per user on top of your Ascora monthly subscription.
Granting App Permissions
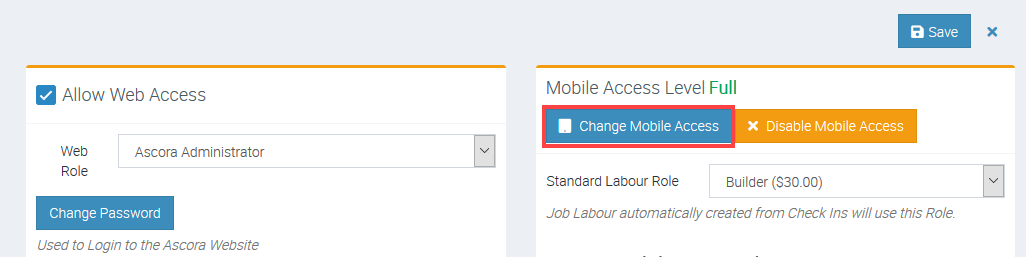
1. To enable mobile access go to Administration → Users → click View beside the user name.
The following screen appears and click Change Mobile Access and select from the three options (No Access, Timesheet Only, Full Access) then, click Save.
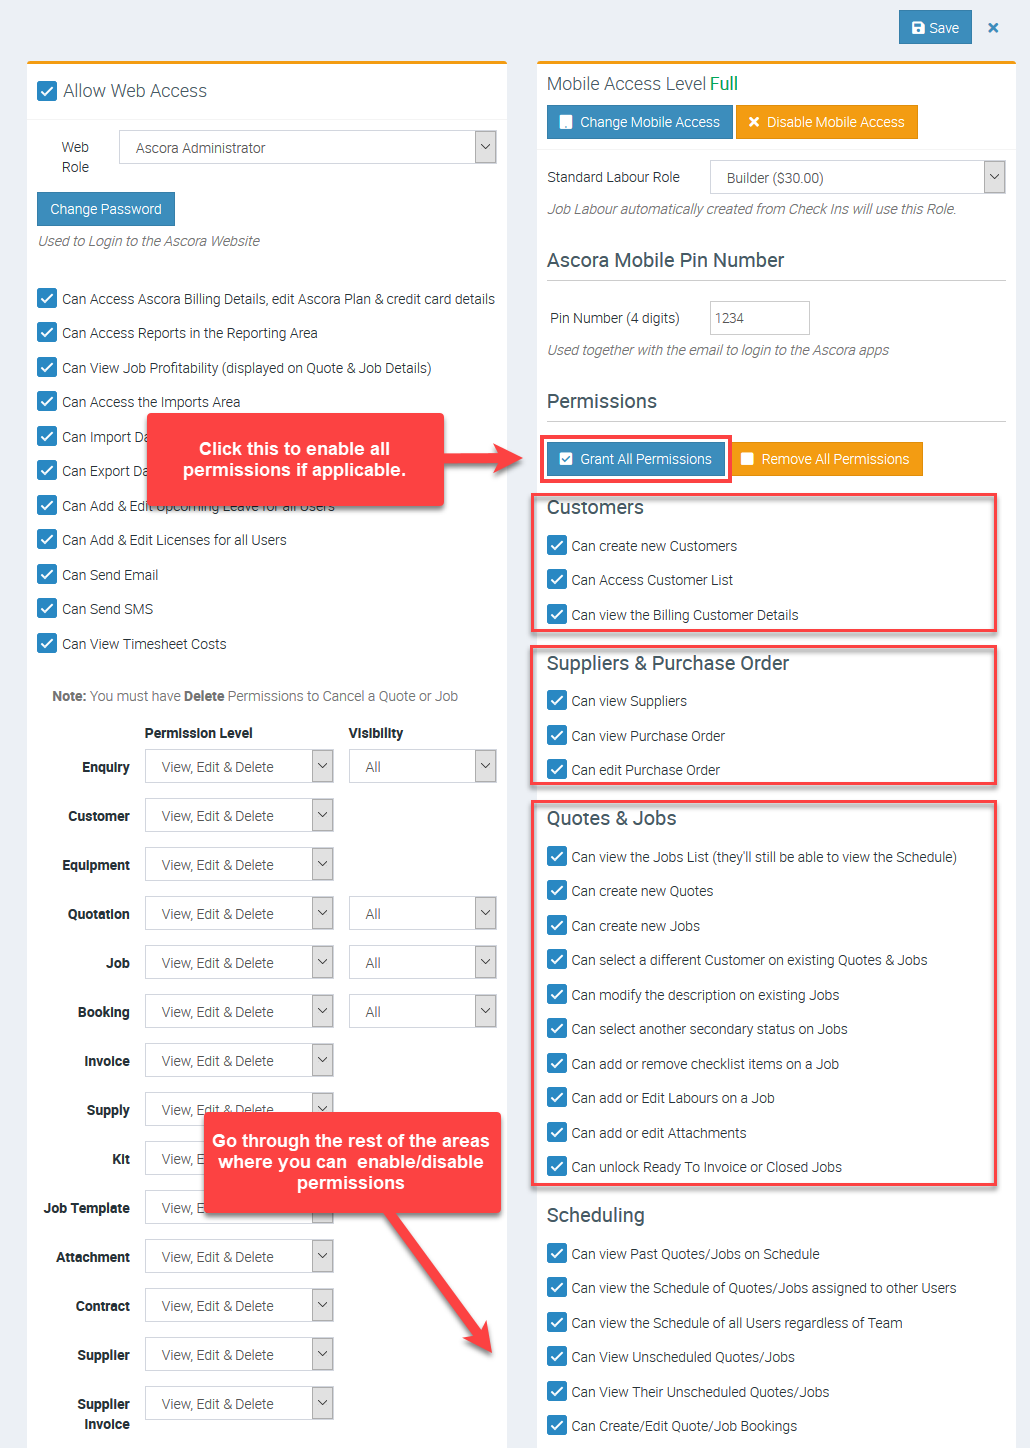
2. Grant permissions in many areas like Customers, Quotes & Jobs, Scheduling, General, etc. by ticking the corresponding boxes or you can tick Grant All Permissions if applicable to that user. After making the changes, click Save.
3. Assign a role and create a PIN which will be used as pass code when accessing the mobile app.
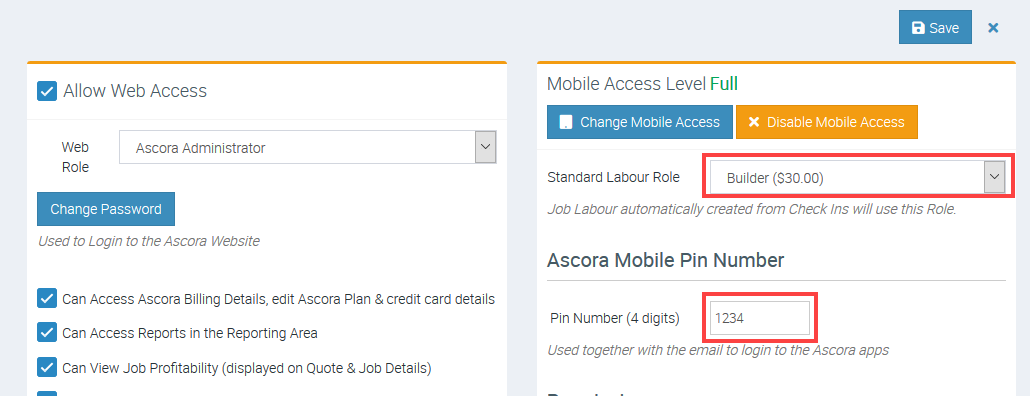
4. Once permissions and PIN are set, click Save.

5. Provide the log in details to the user and let the user download the Mobile App from Play Store for Android devices or App Store for Apple devices.