The Job Email Importer in Ascora streamlines job management by allowing customers to email job details directly to a designated mailbox, where Ascora automatically reads the information and creates a new job or quote. This feature reduces manual data entry, minimizes errors, and ensures job requests are captured efficiently.
With proper setup, you can:
✔ Automate job creation based on predefined email formats.
✔ Differentiate between job and quote requests using keyword recognition.
✔ Map email content to job fields for structured data processing.
✔ Customize import settings to fit your business needs.
This guide will walk you through configuring the importer, setting up email formats, and mapping job fields, ensuring that your workflow remains seamless and organized.
▶ Job Email Import Configuration
Job Email Import Configuration
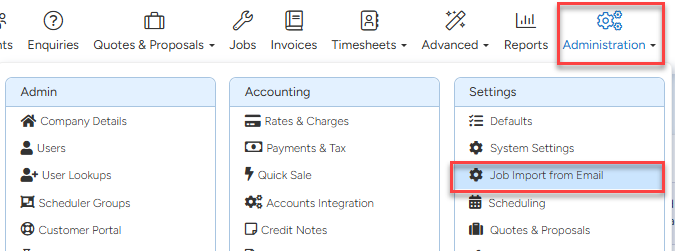
Configuration for the Job Email Importer can be found in Administration → Job Import From Email
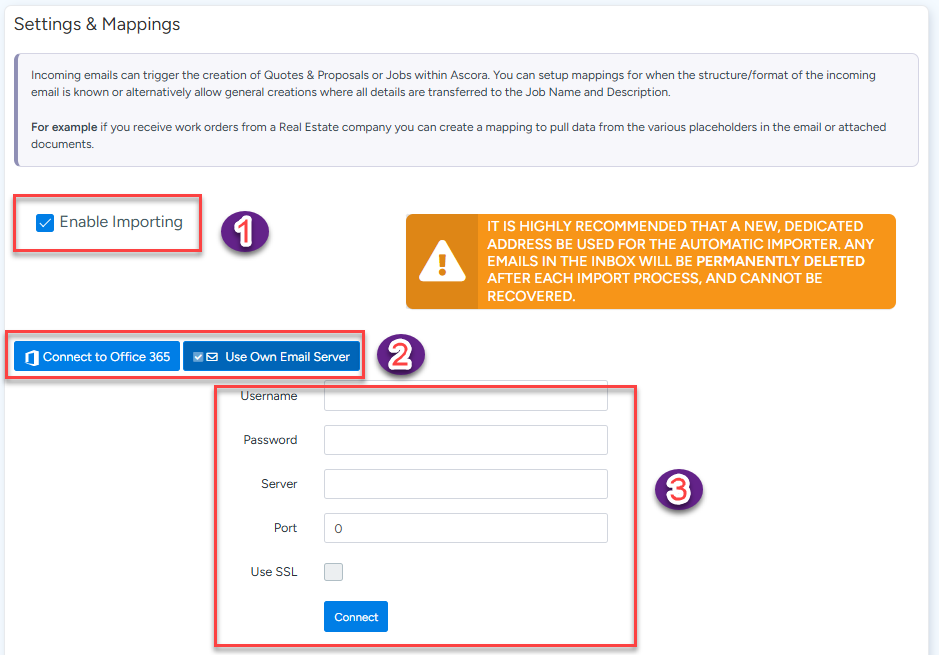
- Enable Importing
- Choose if you want to connect to Office 365 or use your own email server
- Enter in details
- Click connect
Creating a Job Email Format
To create a new format, simply click the Create button.

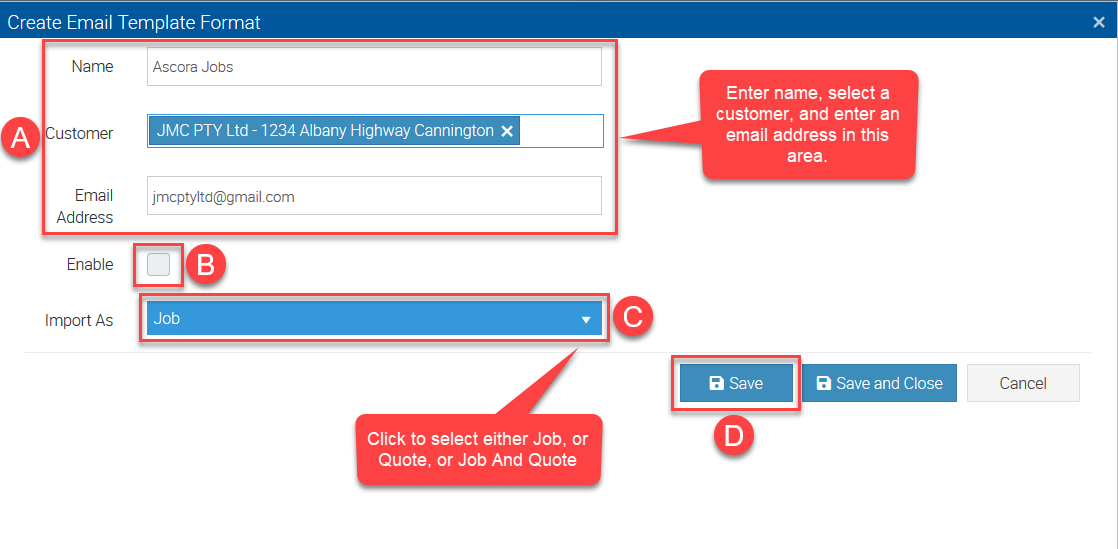
Refer to the image below to complete steps A, B, C, and D.
A. Enter a name for the format, a default Customer to add as the Job Customer and an email address which will be sending the Jobs.
B. Enable option is available to quickly turn the functionality on and off for a certain format. Tick the box to enable and untick the box to disable.
When the format is not enabled, any emails received from the email address will not be processed or imported.
C. Import As - is used to specify what entity type is being imported to Ascora and there are three options, Job, Quote and Quote And Job
Job – the importing process ends on the creation of a Job
Quote- the importing process ends on the creation of a Quote
Quote And Job – depending on a ‘key word’ entered, the importer can either create a Quote or a Job.
D. Click Save to Continue.
In this example we are are setting up an automatic job import for the emails coming from jmcptyltd@gmail.com and once imported, jobs will be added to customer JMC PTY Ltd.
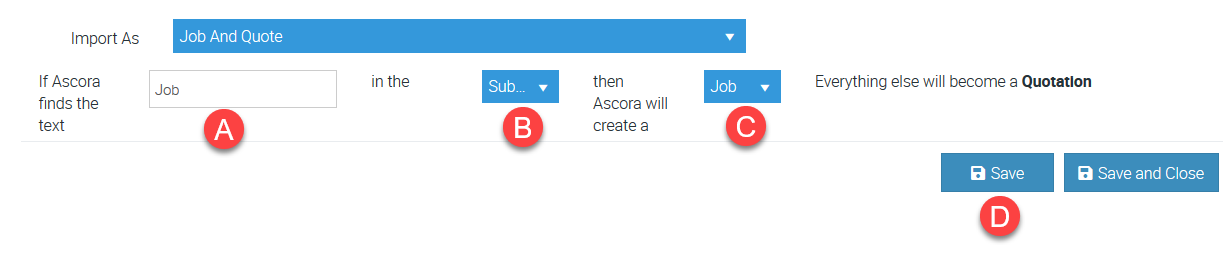
Refer to the image below to complete steps A, B, C, and D when you choose to import the emails as Job And Quote.
A. If Ascora finds the text – is where you enter a key word or text which helps identify the information to be imported either as a job or a quote.
B. In the – is where you set up where to look up for the key word and the options are Subject Line and Document.
Subject Line – the email subject
Document – any part of the PDF or email body
C. Then Ascora Will Create a – you can select either Job or Quote depending on what you're trying to set up.
D. Click Save to continue.
In this example, we selected the option to import the email as Job And Quote and configured it to identify the key word "job" from the subject line and import as job. If the importer cannot find the key word "job" then the email will be imported as quote.
Creating Fields for Mapping
Once the format has been created, mappings for the Jobs fields can be created.
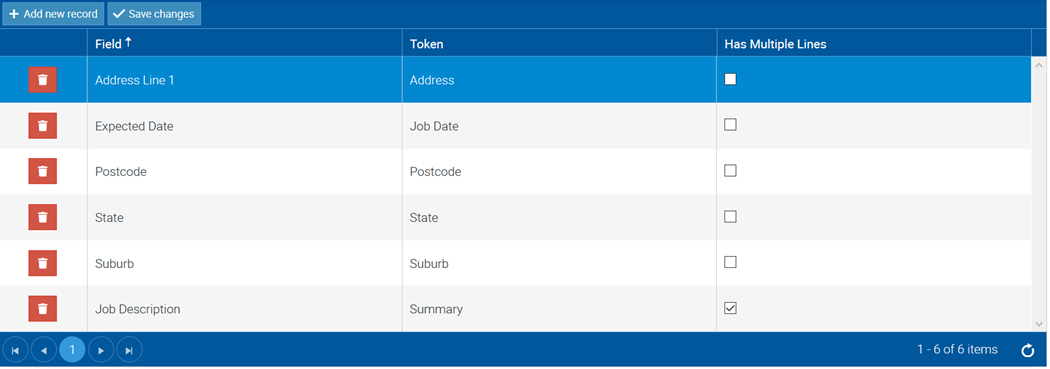
To add a new mapping, simply click Add New Record button to add a new row to the table below.
The table contains the following columns:
A. Field - use to select the Job Field that is to be mapped from the received email.
B. Token - use to specify the specific wording or terminology used in the email to describe the Field selected.
C. Has Multiple Lines - use to specify that the field may be separated over multiple lines of the email.
D. Read Whole Line – reads the whole line, otherwise will read until the end token appears.
E. Has To Be Unique – if the information of this token is already added on a quote or job, the import process stops and end up not creating any quote or job, only applies to purchase order and client order number
F. End Token – a stop token when is reading a whole line.

An example below.
Got a question?
Submit an Idea 💡 Go to Ideas Portal