The Ascora Customer Portal provides a convenient self-service platform for your customers to create, view, and manage their Jobs and Quotes. Through customizable permissions, you can grant individual Contacts access to all jobs tied to their company or limit visibility to those where they’re the primary contact. This flexibility ensures each user sees only the relevant information. You can also configure Job Notifications based on specific Job Types, so your team is instantly alerted whenever a new job is created via the portal.
Continue reading to learn how to adjust your portal settings, invite contacts, and control which attachments and photos are visible to your customers.
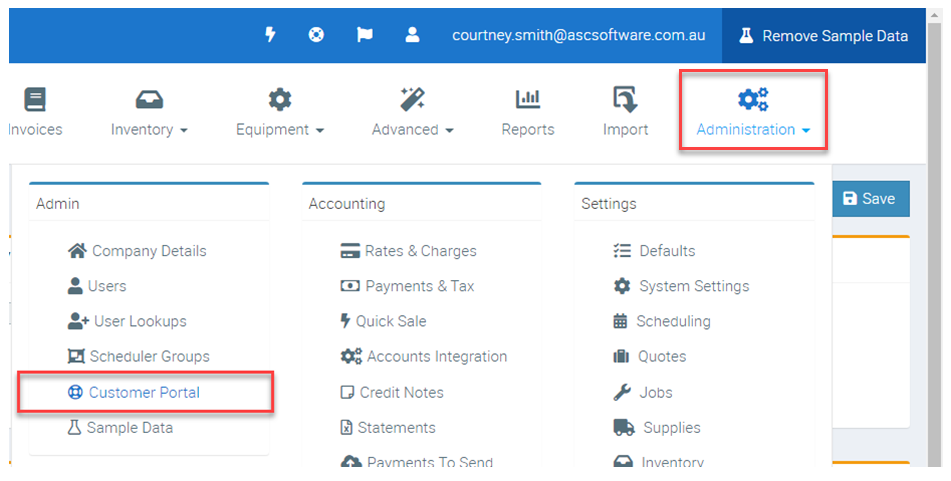
Customer Portal Settings
All general, high-level settings for the Customer Portal are available under Administration → Customer Portal. These settings govern how your customers interact with their portal, what data is visible, and who receives notifications.
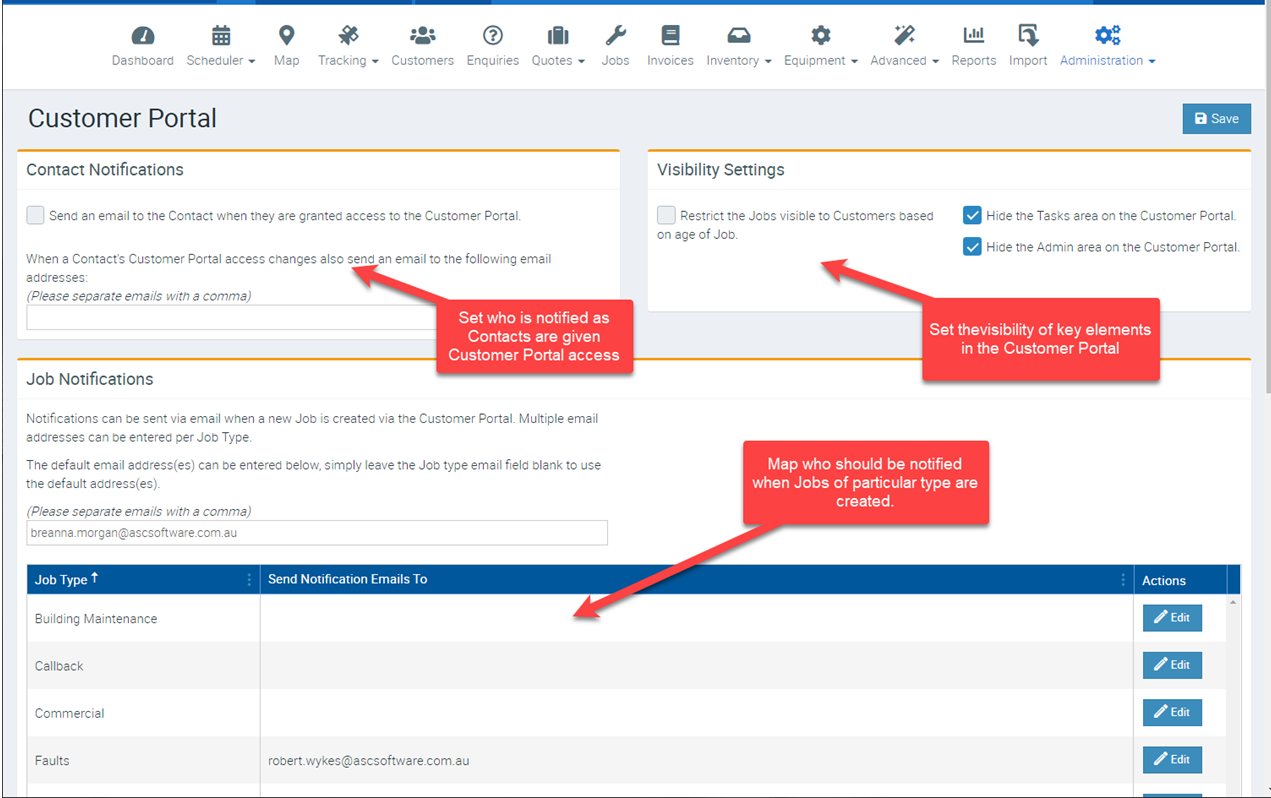
Key Settings
The Key Settings within the Customer Portal configuration allow you to fine-tune exactly what your customers can see and who gets notified when important actions occur. By adjusting these options, you can limit the age of visible jobs, specify which team members receive email alerts for new portal contacts or job creations, and control whether certain administrative details are displayed to your customers.
- Contact Notifications
- Enter one or more email addresses that should receive notifications when Contacts are invited to the Customer Portal. This helps your team stay informed of new portal users who may need support or follow-up.
- Visibility Settings
- Limit Job Visibility by Age: Restrict customers from viewing older jobs by specifying a cutoff date.
- Hide Tasks & Admin Details: Decide whether tasks and certain “admin-only” fields (like invoicing preferences) are visible to portal users. This helps maintain a clean, customer-friendly interface.
- Job Notifications
- Job Type Notifications: Assign specific email addresses to receive alerts whenever a new job is created for certain job types (e.g., Maintenance, Installation).
- Global Notification List: Set an overall list of recipients to be notified for all new jobs, regardless of type.
Inviting Contacts
Once the global portal settings are configured, the next step is to invite specific contacts to use the portal. Each Contact can have individualized permissions and their own login credentials.
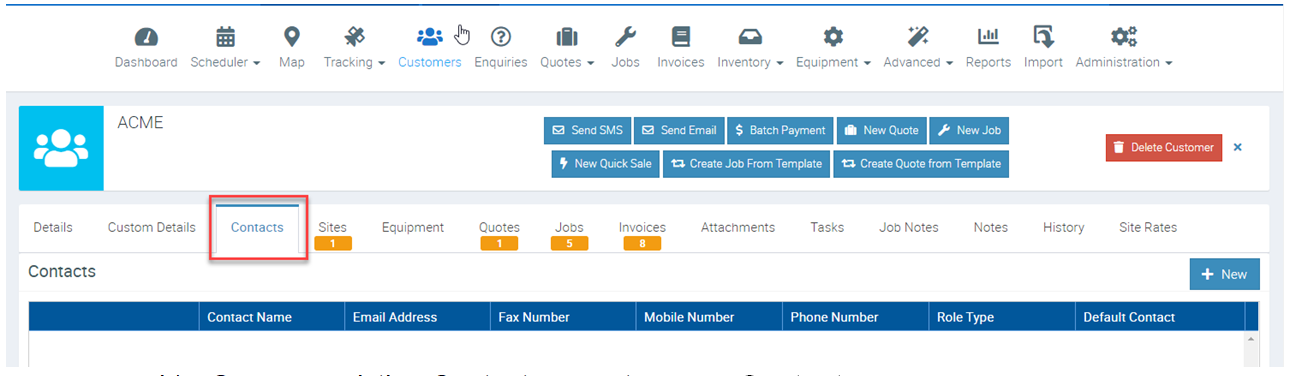
- Open Customer Details
- Go to Customers and select the relevant customer record.
- In the Contacts tab, you can view, create, or edit the contacts associated with this customer.
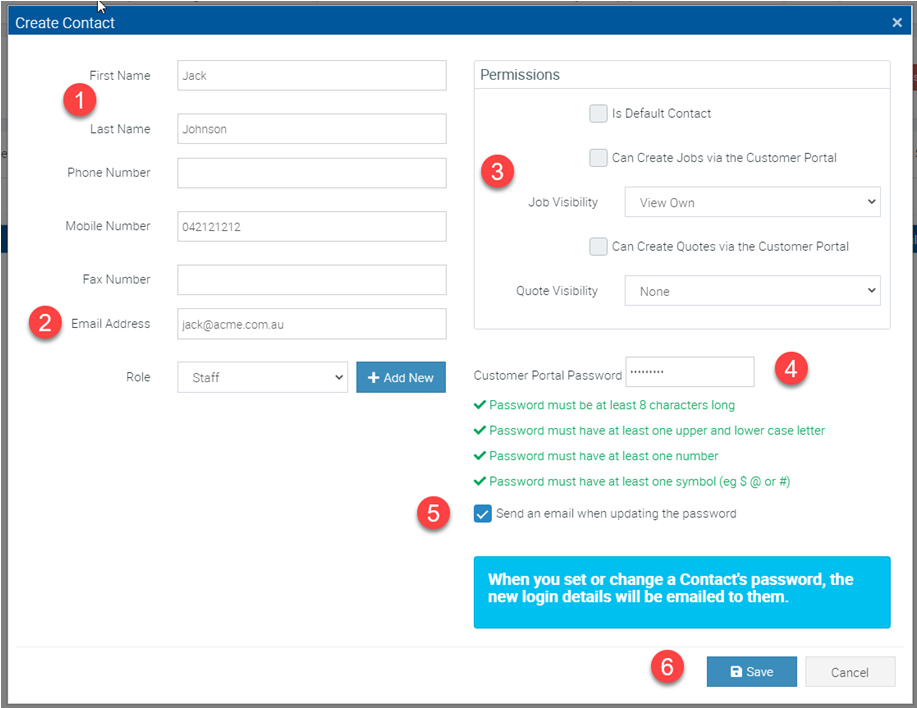
- Create or Edit a Contact
- Click +New (or select an existing contact to update).
- Complete the required fields:
- Contact Name
- Email Address (this becomes the login username)
- Permissions: Check which areas (Jobs, Quotes) this contact can view, edit, or create.
- Password: Must meet Ascora’s complexity requirements.
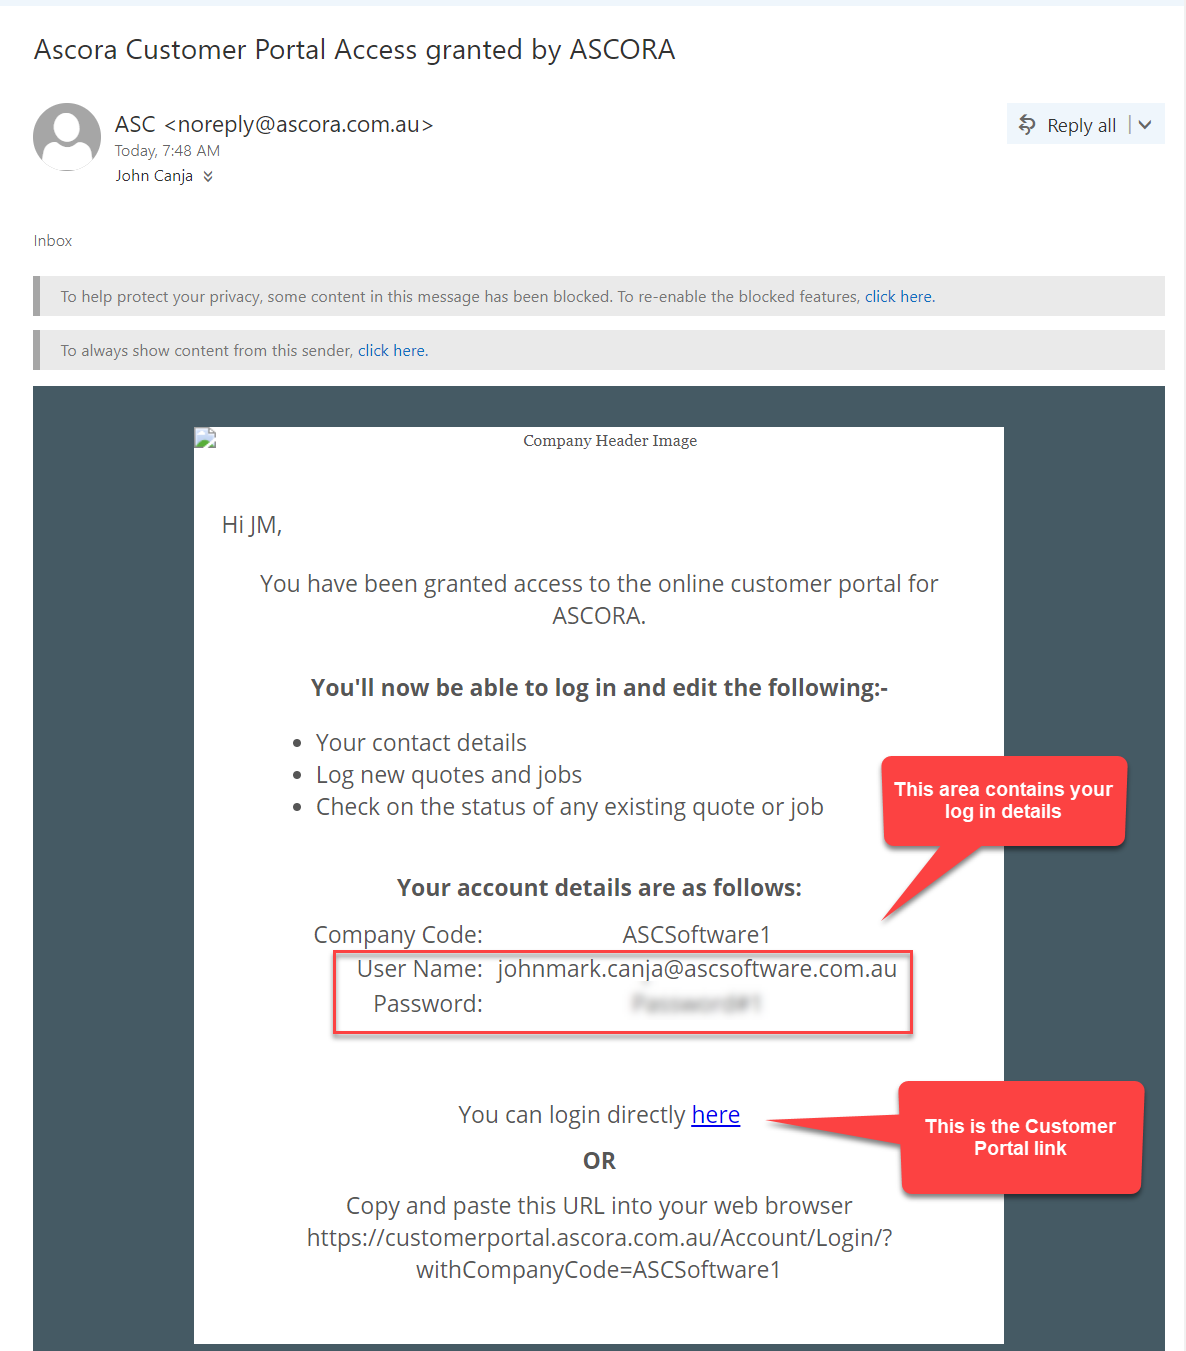
- Email Notification: Opt to send the contact an auto-generated email with their login details, or plan to provide them the details manually.
- Click Save to finalize
Accessing the Customer Portal
After you save the contact with portal access:
Invitation Email
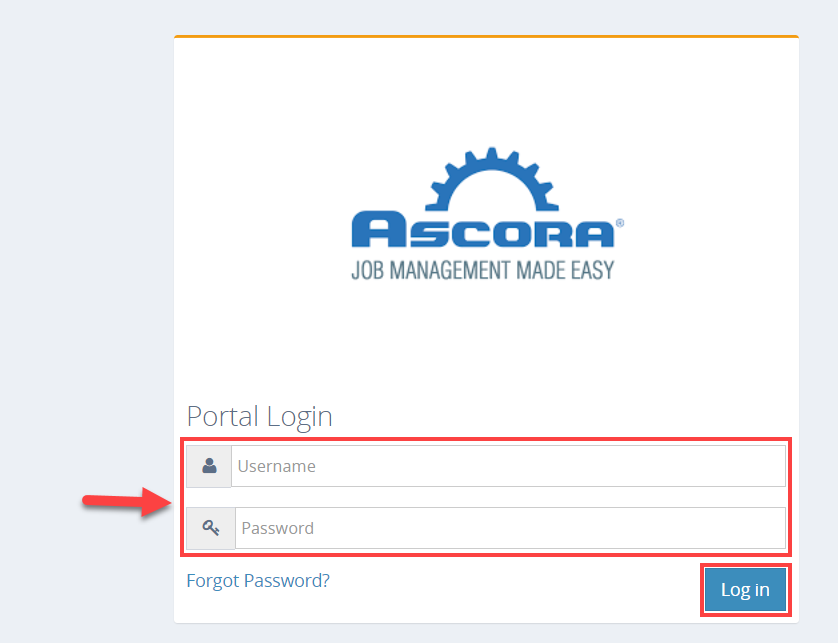
Portal Login
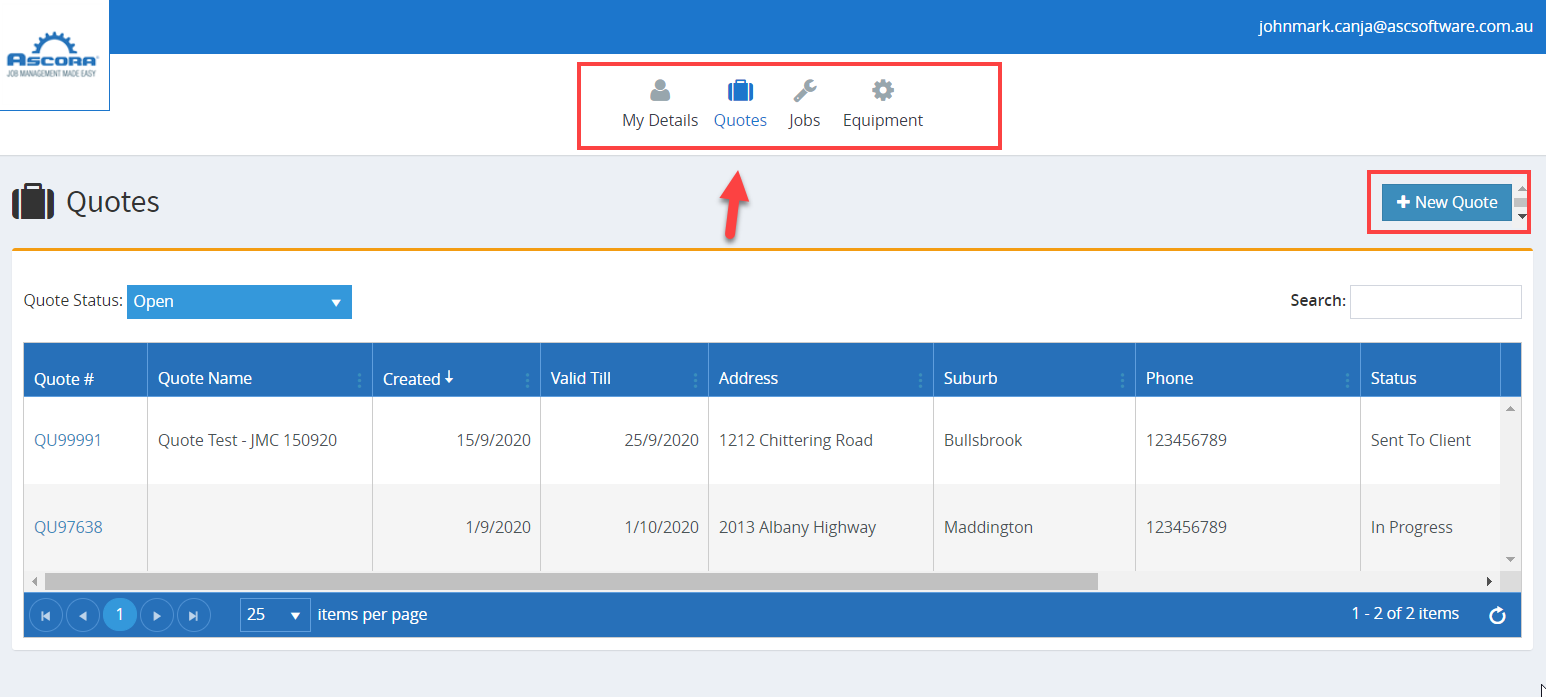
Quote Creation & More
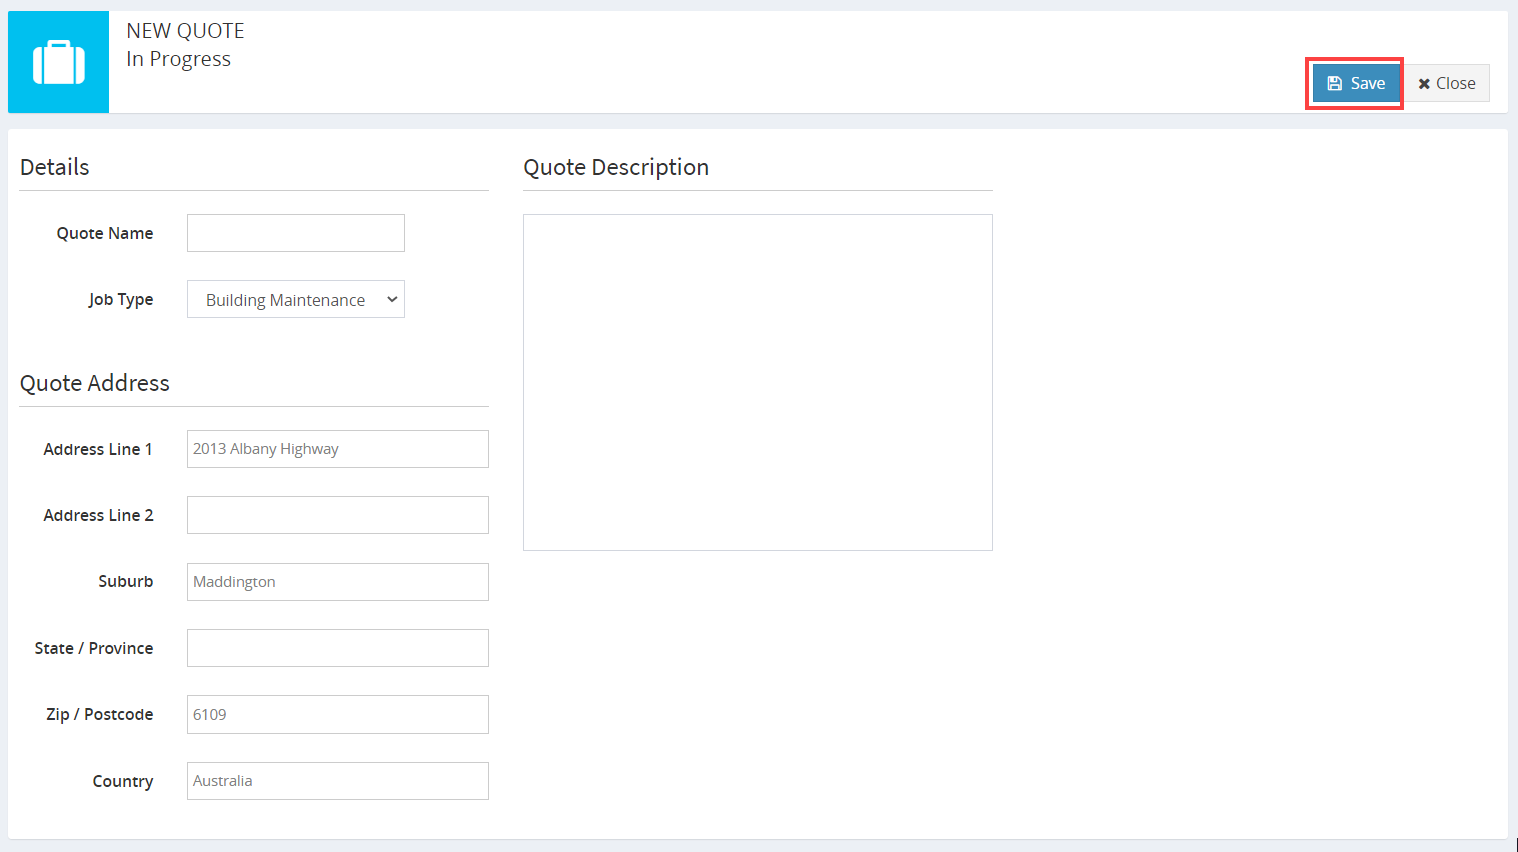
- If permitted, the contact can create new quotes by entering basic details like description and estimated costs. Once saved, the quote appears under Quotes in Ascora’s web interface for the office team to finalize (assigning users, scheduling, etc.).
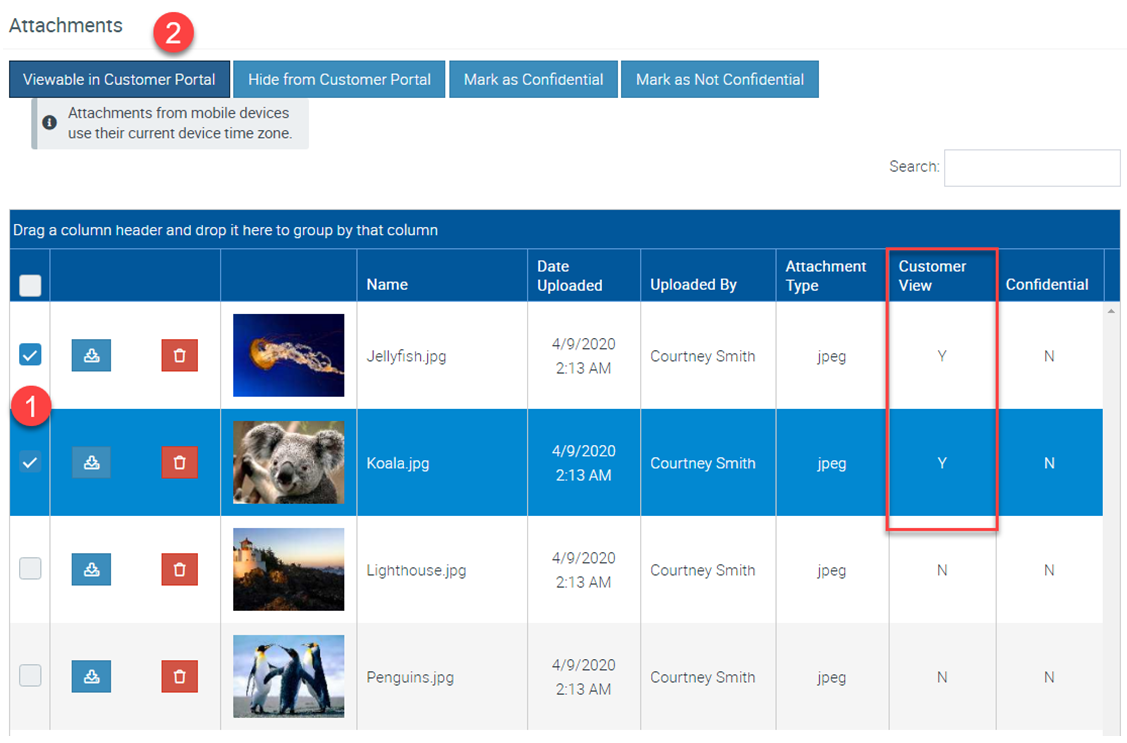
Sharing Job Photos
Ascora allows you to control which documents and images are visible to portal users. By default, Job Photos and other files are hidden from customers until you explicitly enable them.
- Open the Attachments Tab
- Within the job’s Attachments tab, locate the file(s) you want to share.
- Enable Portal Visibility
- Check the box next to each file you wish to share, then click Viewable in Customer Portal.
- The “Customer View” column will change to “Y,” indicating the selected files are now visible.
That’s it! You’ve now configured your Customer Portal Settings, invited Contacts to access it, and learned how to share Job Photos with your customers. By leveraging these options, you can offer a convenient self-service experience that reduces administrative tasks and improves communication between your team and your clients.
Got a question?
Submit an Idea 💡 Go to Ideas Portal