Classifying your customers and organizing their information is essential for effective management in Ascora. By utilizing Customer Types and Contact Roles, you can streamline your customer database and enhance your interactions. This guide will walk you through adding customer classifications, assigning roles, and customizing the details for individual customers. Whether you're setting up a new customer, managing contact roles, or specifying customer types, Ascora provides intuitive tools to ensure your customer data is structured and accessible.
Adding Customer Types
When creating your customers in Ascora, you can add Customer Types to classify each of your customers.
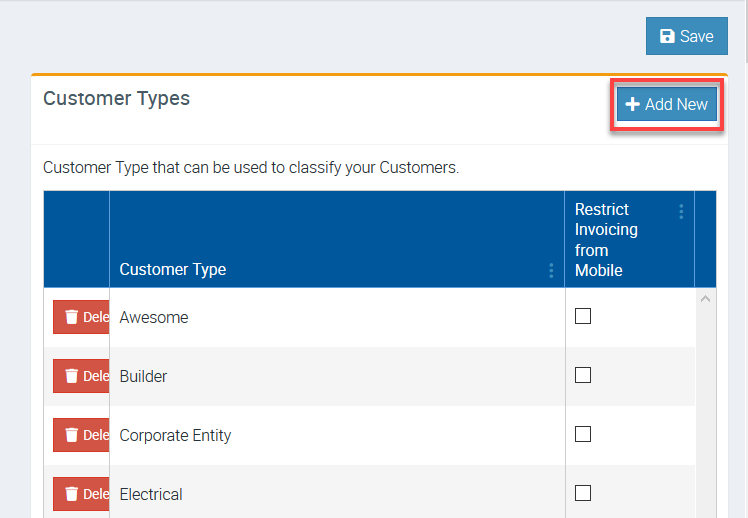
1. Go to Administration → Customers and click Add New beside Customer Types.
After adding your Customer Types, ensure to click the Save button right above the Add New button.
Adding Customer Contact Role
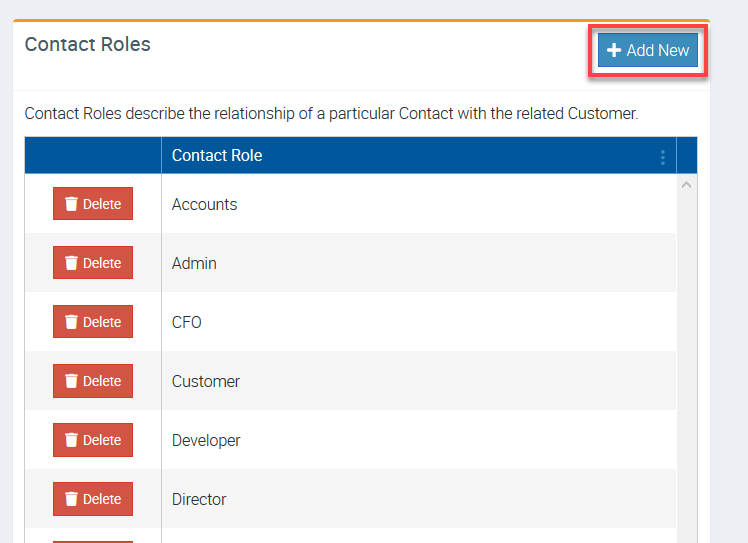
1. You can add Customer Contact Role from the same screen (Administration → Customers) and scroll down and look for Contact Roles on the left panel.
Selecting your Customer Type
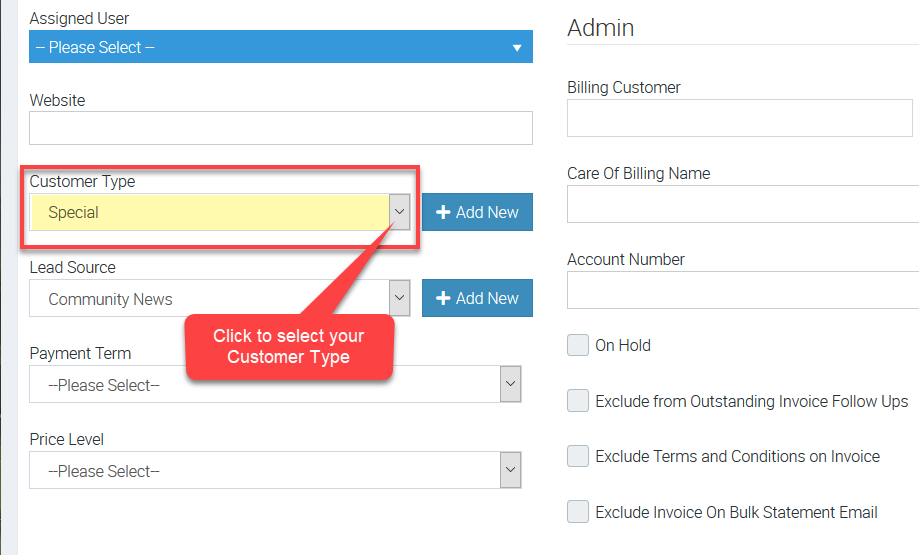
1. Go to Customers menu and select one of your customers and click Details tab.

2. Scroll down and look for Customer Type field in the left panel.
In this example, we selected Special as our Customer Type.
Got a question?
Submit an Idea 💡 Go to Ideas Portal