Keeping track of individual contacts within an organization helps ensure that you always reach the right person at the right time. In Ascora, each Contact record is associated with a specific Customer, and can represent anyone from a receptionist to a property manager or business owner. You can also assign a Contact Role to describe each person’s relationship with the customer, making your records more organized and searchable.
Why Use Customer Contacts?
- Maintain multiple points of communication for each customer.
- Designate default contacts for quick reference or service requests.
- Grant or restrict Customer Portal access to specific individuals.
- Clearly identify each contact’s role (e.g., principal, property manager, agent) for better organization.
Use the following steps to create new contacts, assign roles, and set up permissions, so you can manage your customer relationships with greater efficiency.
Choose the Customers Icon in the Top Menu to display the Customer List then select the applicable Customer from the Customers List.

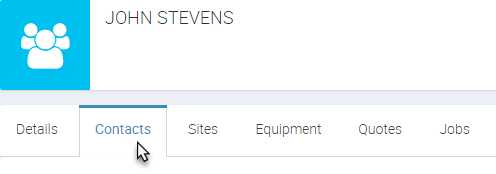
1. On the Customer Card, choose the Contacts Tab.
2. Click the +New button to open the Create Contact pop-up window.

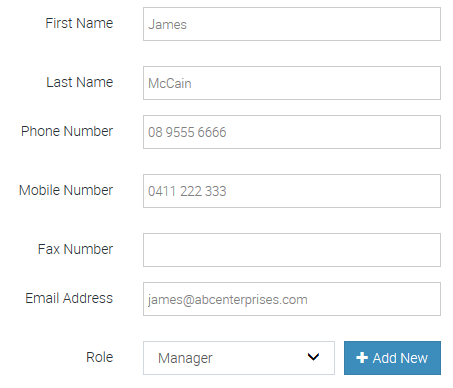
3. Enter the Contact's Details and select a Contact Role from the dropdown menu. If the required Contact Role doesn't exist, you can create a new Contact Role by clicking the +Add New button.
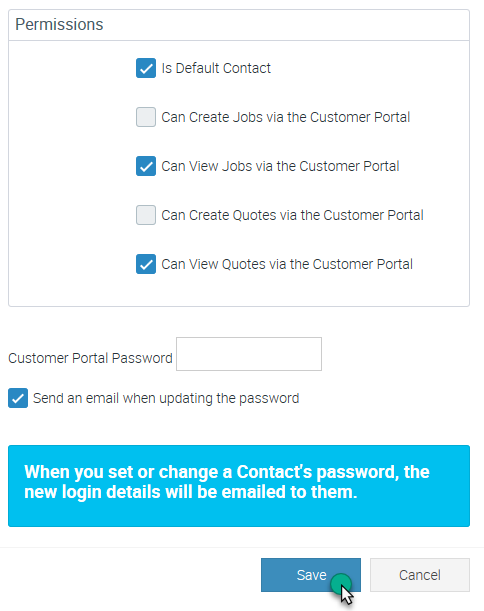
4. Work through the list of available Permissions options to set the Contact as the Default Contact (if required) and allow or restrict access in the Customer Portal by ticking the applicable Permissions checkboxes.
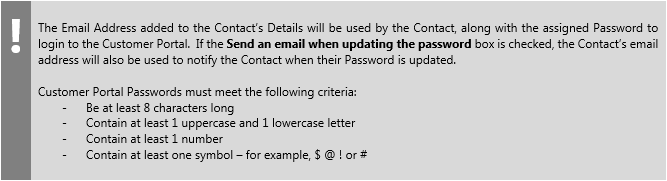
5. If you are granting the Contact access to the Customer Portal, set a Customer Portal Password and optionally choose to send the Contact an email with their Customer Portal Password information.
6. Once you are ready, click the Save button.
Got a question?
Submit an Idea 💡 Go to Ideas Portal