Creating and managing your customer records in Ascora is an essential step to ensure smooth operations and accurate tracking of your business interactions. By setting up each customer correctly, you can streamline your processes, keep track of important details, and ensure that your communications, invoicing, and job management are well-organized.
Follow these simple steps to add a new customer to your Ascora account, from entering basic details to selecting the appropriate payment terms and assigning the right contacts.
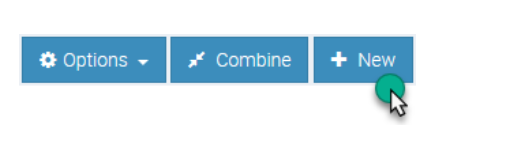
Choose the Customers Icon in the Top Menu to display the Customer List.

On the Customer List Screen, click the +New button to create a New Customer.
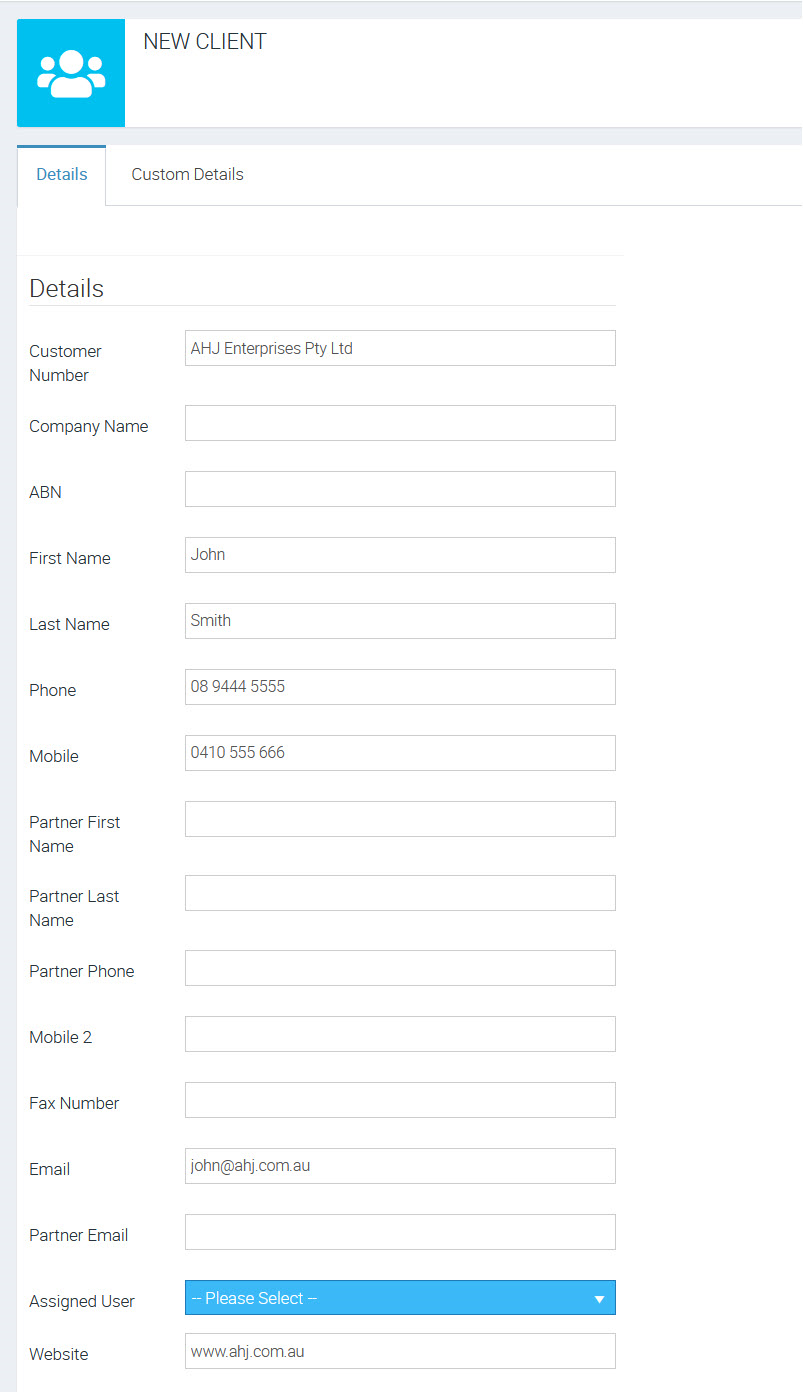
1. Enter the Customer's Details
2. Select an Assigned User (if required). This is used for assigning an account manager to a customer record, and can be useful in filtering customers in the Customer menu.

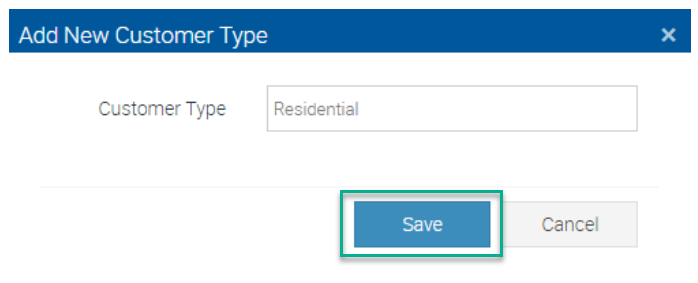
3. Select a Customer Type from the dropdown menu.

4. Select a Lead Source from the dropdown menu. If the Lead Source you require does not exist, you can create one by clicking the +Add New button. Type the new Lead Source into the textbox and click Save.
5. Select a Payment Term from the dropdown menu. Payment Terms can only be created and defined in your Administration Settings. See Administration > Payments & Tax > Payment Terms.
6. Select a Price Level from the dropdown menu (if required). Price Levels can only be created and defined in your Administration Settings. See Administration > Supplies > Price Levels
7. Enter the Site and Billing Address Details. Ascora uses Google auto-complete functionality to make entering addresses accurate and easy. Simply start typing the Customer’s Site Address in the Address Line 1 textbox and select the correct address from the dropdown list.
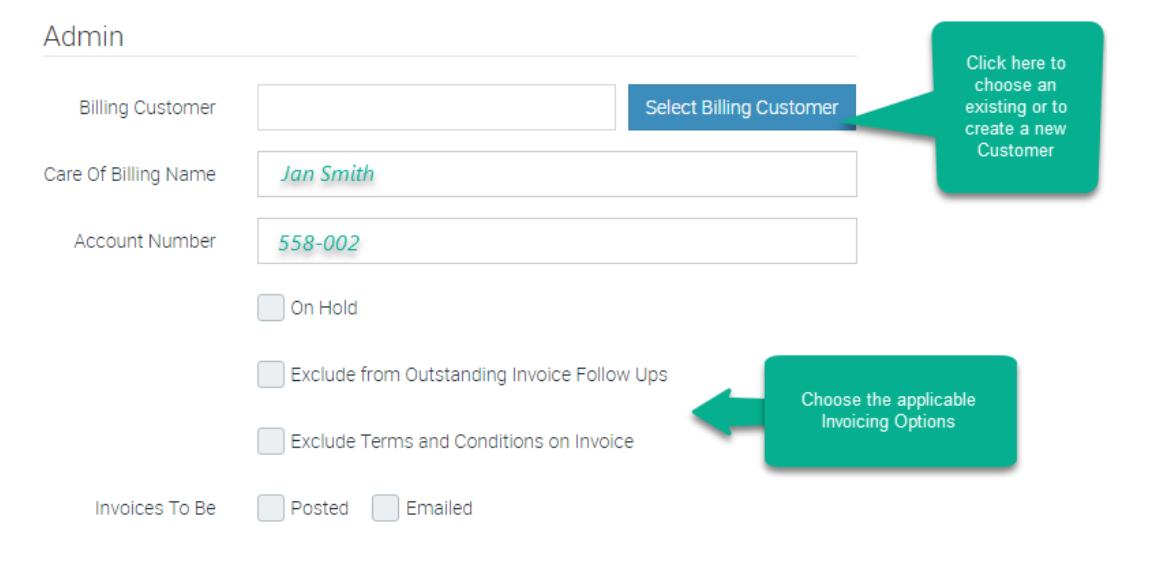
8. Assign a Billing Customer (if required). In some instances, the Site Customer and Billing Customer will not be the same. For example, you may complete work for a tenant (the Site Customer) but will be Invoicing the property manager (Billing Customer). To assign a Billing Customer:
a. In the Admin section, click the Select Billing Customer box. Locate the Billing Customer in the Customer List then click the Select button. You can use the Search Box to narrow the list if required.
b. Complete the Billing Customer configuration by applying a Care Of Name and/or Account Number if required. Apply the available Invoicing options by ticking the relevant checkboxes.
9. Once you have finished entering all the available Customer Details, click the Save button, which is located near the top-right of the screen.
Translations
In Ascora, this section is labeled Customer, but we understand that depending on your business, you might prefer to refer to them as clients. Whether you call them customers, clients, or something else, this section is where you’ll manage all the key details and interactions for the people you serve. The tools and settings available here are designed to help you stay organized, track communication, and ensure that your client relationships are well-maintained, regardless of what you choose to call them.