Ascora allows you to integrate your email account, whether it's Gmail, Office 365, or another email client, directly into the system. Once connected, you can configure how Scheduler emails are sent and managed, ensuring efficient communication with your clients and team. With flexible options for sender configurations, Ascora adapts to your business needs—whether emails are sent from a central account, individual users, or a custom address.
This guide will help you:
- Set up your email account in Ascora.
- Configure email sender settings for quotes, jobs, purchase orders, invoices, and statements.
- Test the Scheduler email functionality to ensure smooth communication.
By optimizing your email settings, you can streamline job notifications, enhance client engagement, and maintain a professional, consistent brand presence. Ascora's email configuration also allows you to customize reply-to addresses, ensuring responses are directed to the right team members or departments.
Let’s explore how to set up and leverage Scheduler email settings effectively to maximize your workflow efficiency and client satisfaction!
Email Settings
1. Go to Administration → System Settings.
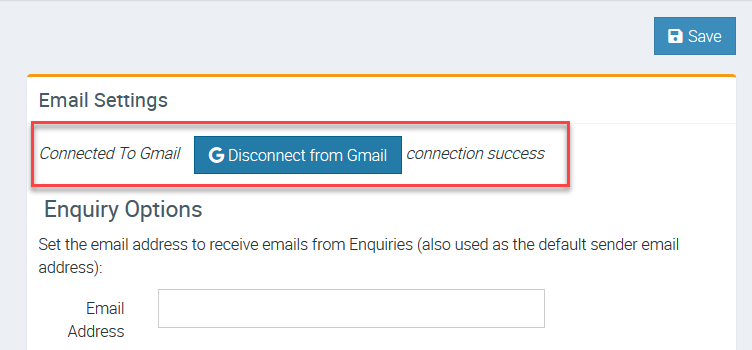
In this example, Gmail account is connected although email address is not shown. With Office 365, you can see the email address connected right below Email Settings.
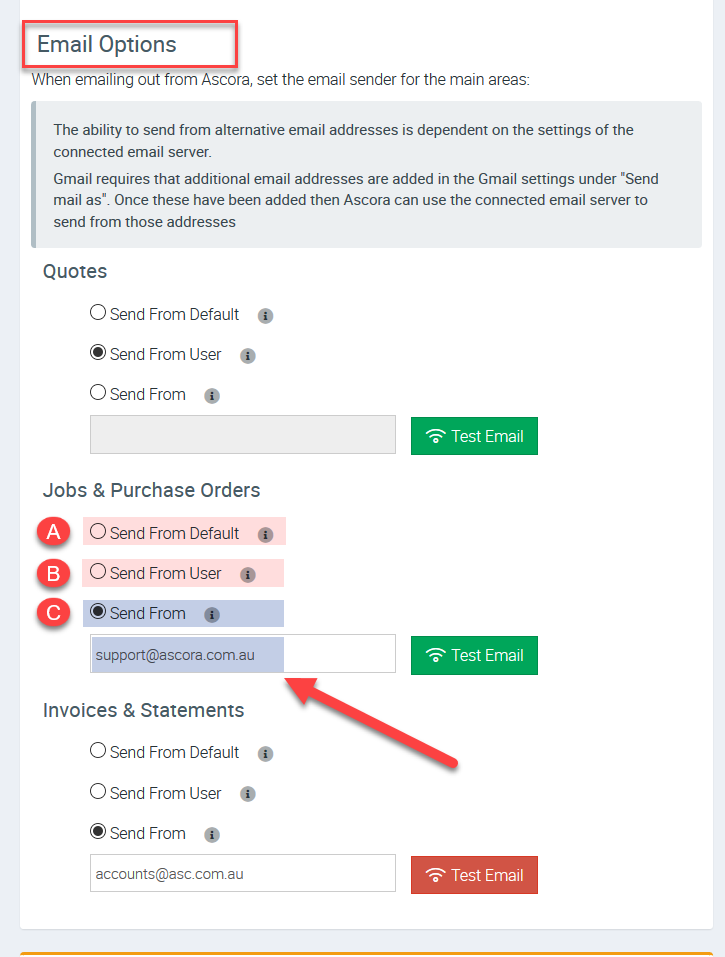
2. Under Email Options, you can select from three configurations on email sender and you can configure this for Quotes, Jobs & Purchase Orders, and Invoice & Statements.
A. Send from Default - emails are sent from your email account connected to Ascora.
B. Send From User - emails are sent from user who is signed in.
C. Send From - emails are sent from a specific email address that you can specify.
In this example, we are configuring to have Jobs & Purchase Orders related emails sent from a specific email sender which is support@ascora.com.au and this also works by having replies sent to that email address.
Testing Scheduler Email
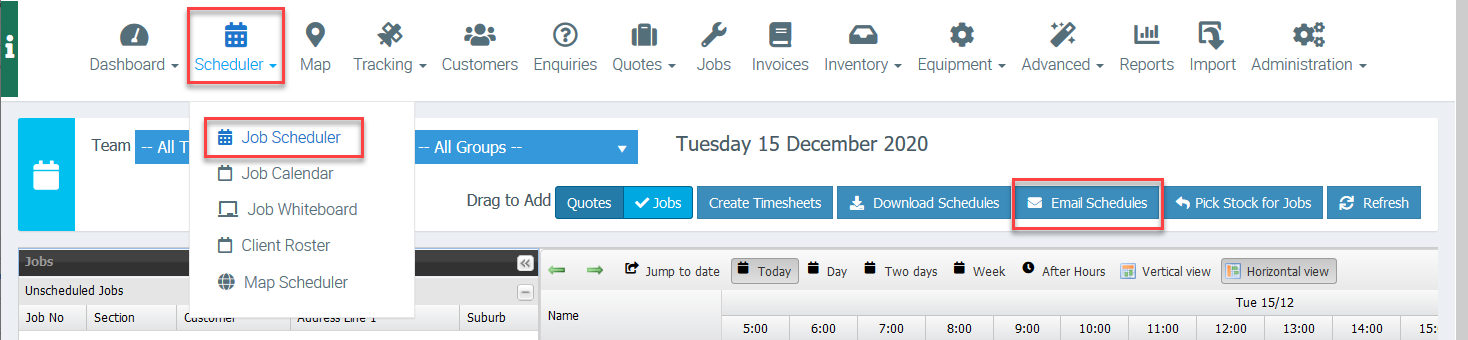
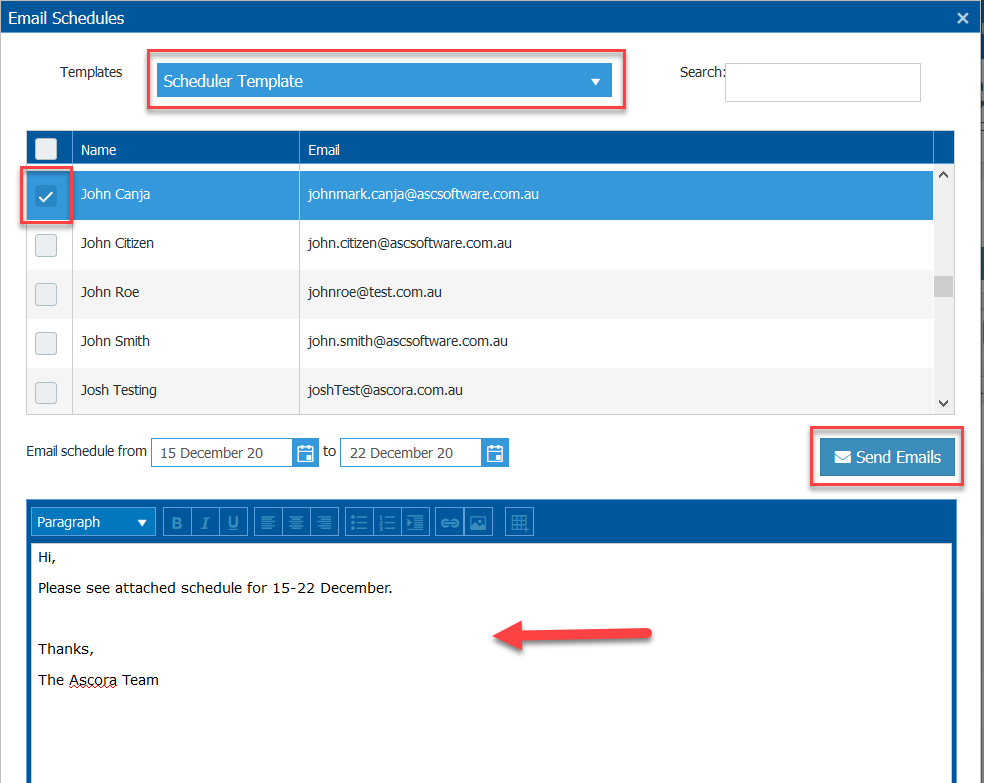
1. Go to Scheduler → Job Scheduler → Email Schedules
2. Select your template and tick the box beside the recipient's name and enter your email message. Once done, click Send Emails.
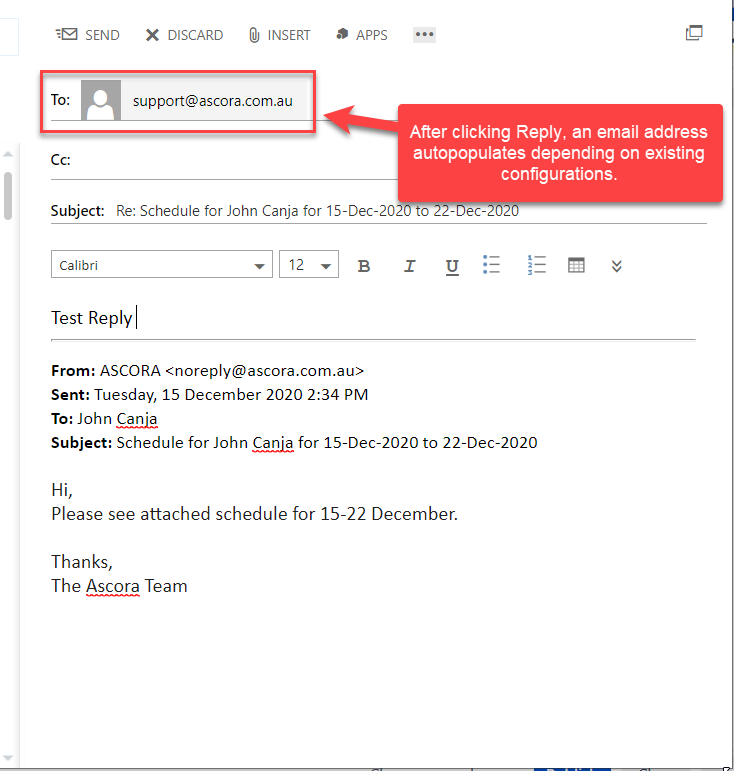
3. Access your email and you should have received one from noreply@ascora.com.au.
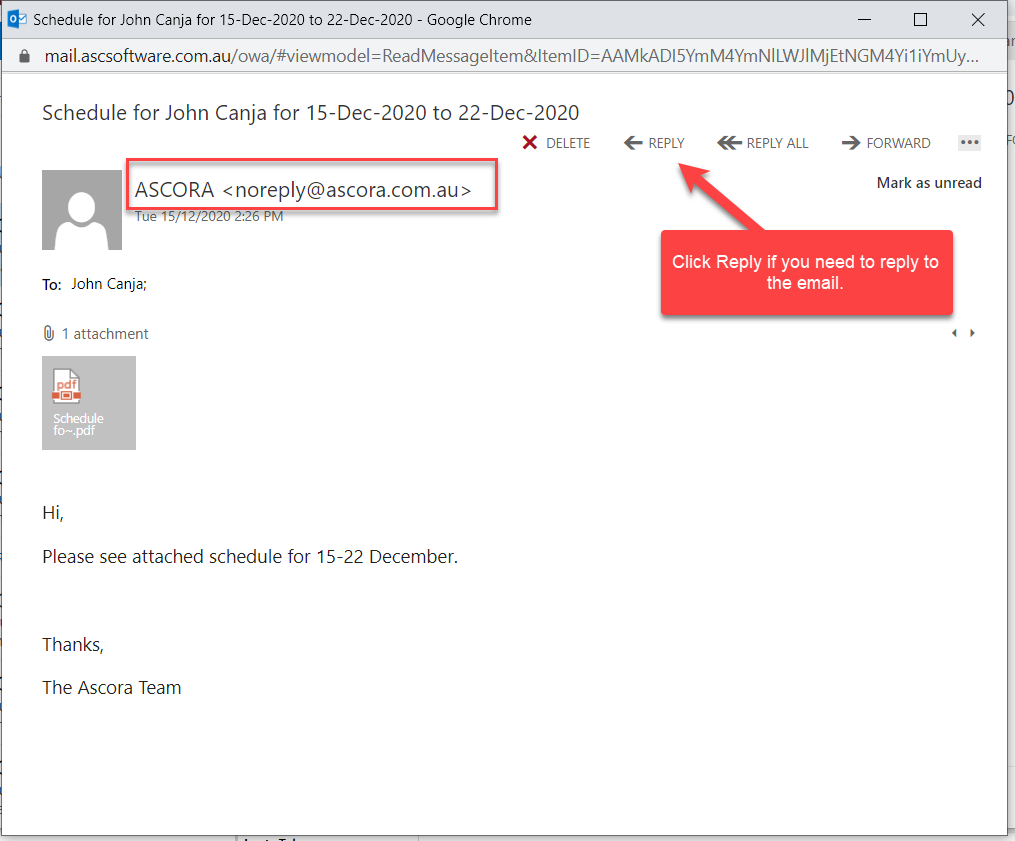
4. After clicking Reply button, the recipient's email address will auto populate depending on settings.
In this example, we configured to use support@ascora.com.au for Jobs related emails and thus it's the default recipient when replying to email.